1. 53 Markers and Skeleton Definitions
53 Markers descriptions
| Item Number | Marker Name | Description |
|---|---|---|
| Item Number | Marker Name | Description |
| 1 | HeadTop | Top of the head |
| 2 | LHeadFront | Front left side of the head |
| 3 | LHeadBack | Back left side of the head |
| 4 | RHeadFront | Front right side of the head |
| 5 | RHeadBack | Back right side of the head |
| 6 | C7 | Base of the neck at the back |
| 7 | T10 | Symmetrical point on the back of the sternum |
| 8 | CLAV | Collarbone |
| 9 | STRN | Sternum (midpoint of the centerline of the upper body) |
| 10 | LShoulderFront | Front of the left shoulder |
| 11 | LShoulderBack | Back of the left shoulder |
| 12 | LUArmHight | Left upper arm |
| 13 | LElbow | Left elbow |
| 14 | LElbowIn | Inside of left elbow |
| 15 | LFoream | Outer side of the left forearm |
| 16 | LWristIn | Inside of the left wrist (thumb side) |
| 17 | LWristOut | Outer side of the left wrist |
| 18 | LHandIn | Base of the left index finger joint |
| 19 | LHandOut | 2cm below the root of the little finger joint of the left hand (space for one marker) |
| 20 | RShoulderFront | Front of the right shoulder |
| 21 | RShoulderBack | Back of the right shoulder |
| 22 | RUArmHight | Right upper arm |
| 23 | RElbow | Right elbow |
| 24 | RElbowIn | Inside of right elbow |
| 25 | RFoream | Outer side of the right forearm |
| 26 | RWristIn | Inside of the right wrist (thumb side) |
| 27 | RWristOut | Outer side of the right wrist |
| 28 | RHandIn | Base of the right index finger joint |
| 29 | RHandOut | 2cm below the root of the little finger joint of the right hand (space for one marker) |
| 30 | WaistLFront | Front of the left hip |
| 31 | WaistLSide | Side of the left hip (middle position) |
| 32 | WaistLBack | Back of the left hip |
| 33 | WaistRFront | Front of the right hip |
| 34 | WaistRSide | Side of the right hip (middle position) |
| 35 | WaistRBack | Back of the right hip |
| 36 | LThight | Left thigh |
| 37 | LKness | Outer side of the left knee |
| 38 | LknessIn | Left Knee (In the middle of the knee) |
| 39 | LShin | Left lower leg |
| 40 | LAnkleOut | Left ankle |
| 41 | LHeel | Heel of the left foot |
| 42 | LMT5 | Outer side of the front of the left foot |
| 43 | LMT1 | Inner side of the front of the left foot |
| 44 | LToe | Ball of the left foot |
| 45 | RThight | Right thigh |
| 46 | RKness | Outer side of the right knee |
| 47 | RKnessIn | Right Knee (In the middle of the knee) |
| 48 | RShin | Right lower leg |
| 49 | RAnkleOut | Right ankle |
| 50 | RHeel | Heel of the right foot |
| 51 | RMT5 | Outer side of the front of the right foot |
| 52 | RMT1 | Inner side of the front of the right foot |
| 53 | RToe | Ball of the right foot |
53 Skeleton description
| Item Number | skeleton Names | Associated Point | Parent Segment skeleton |
|---|---|---|---|
| Item Number | Skeleton Names | Associated Point | Parent Skeleton |
| 1 | Hips | WaistLFront, WaistLSide, WaistLBack, WaistRFront, WaistRSide, WaistRBack | GLOBAL |
| 2 | Spine | T10, STRN, WaistLBack, WaistRBack | Hips |
| 3 | Spine1 | T10, STRN | Spine |
| 4 | Spine2 | C7, T10, CLAV, STRN | Spine1 |
| 5 | Spine3 | C7, T10, CLAV, STRN | Spine2 |
| 6 | LeftShoulder | C7, CLAV, LShoulderFront, LShoulderBack | Spine3 |
| 7 | LeftArm | LShoulderFront, LUArmHigh, LElbow, LElbowIn | LeftShoulder |
| 8 | LeftForeArm | LForearm, LWristIn, LWristOut | LeftArm |
| 9 | LeftHand | LHandIn, LHandOut | LeftForeArm |
| 10 | RightShoulder | C7, CLAV, RShoulderFront, RShoulderBack | Spine3 |
| 11 | RightArm | RShoulderFront, RUArmHigh, RElbow, RElbowIn | RightShoulder |
| 12 | RightForeArm | RForearm, RWristIn, RWristOut | RightArm |
| 13 | RightHand | RHandIn, RHandOut | RightForeArm |
| 14 | Neck | HeadTop、LHeadFront、RHeadBack、RHeadFront、RHeadBack | Spine3 |
| 15 | Head | HeadTop、LHeadFront、LHeadBack、RHeadFront、RHeadBack | Neck |
| 16 | LeftUpLeg | LThigh、LKnee、LKneeIn | Hips |
| 17 | LeftLeg | LKnee、LKneeIn、LShin、LAnkleOut | LeftUpLeg |
| 18 | LeftFoot | LHeel、LMT5、LMT1 | LeftLeg |
| 19 | LeftToeBase | LToe、LMT5、LMT1 | LeftFoot |
| 20 | RightUpLeg | RThigh、RKnee、RKneeIn | Hips |
| 21 | RightLeg | RKnee、RKneeIn、RShin、RAnkleOut | RightUpLeg |
| 22 | RightFoot | RHeel、RMT5、RMT1 | RightLeg |
| 23 | RightToeBase | RToe、RMT5、RMT1 | RightFoot |
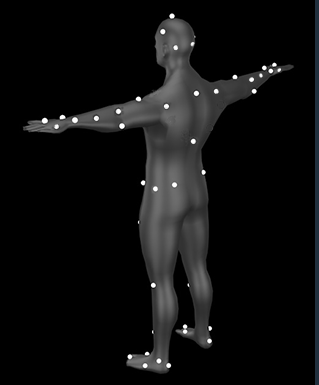
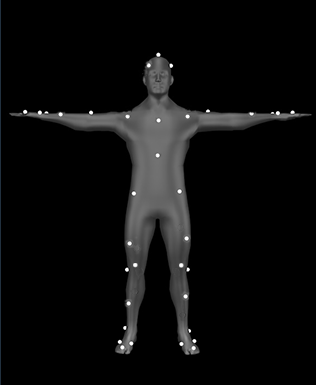
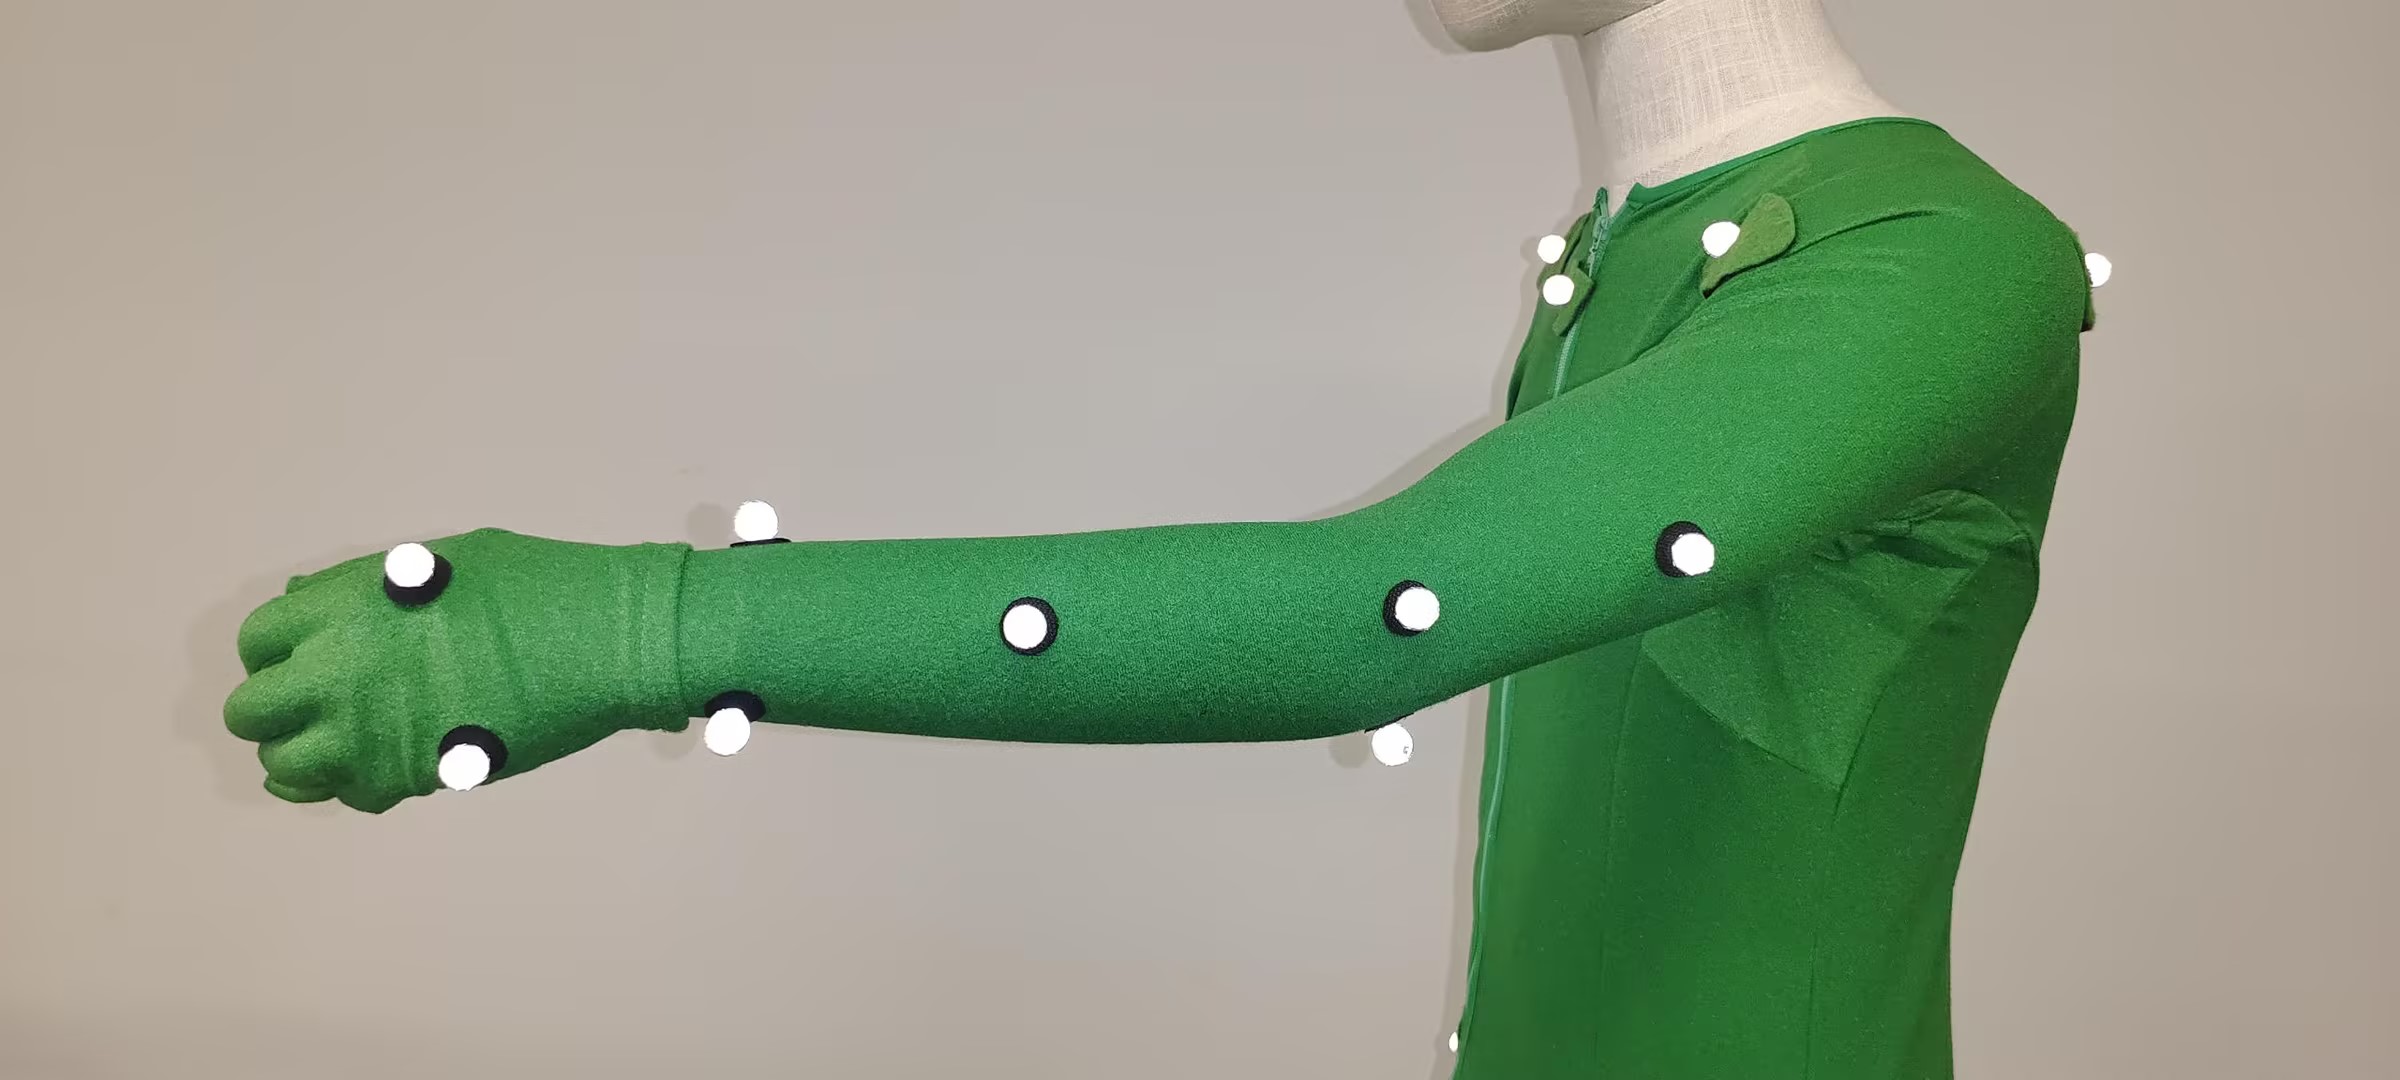
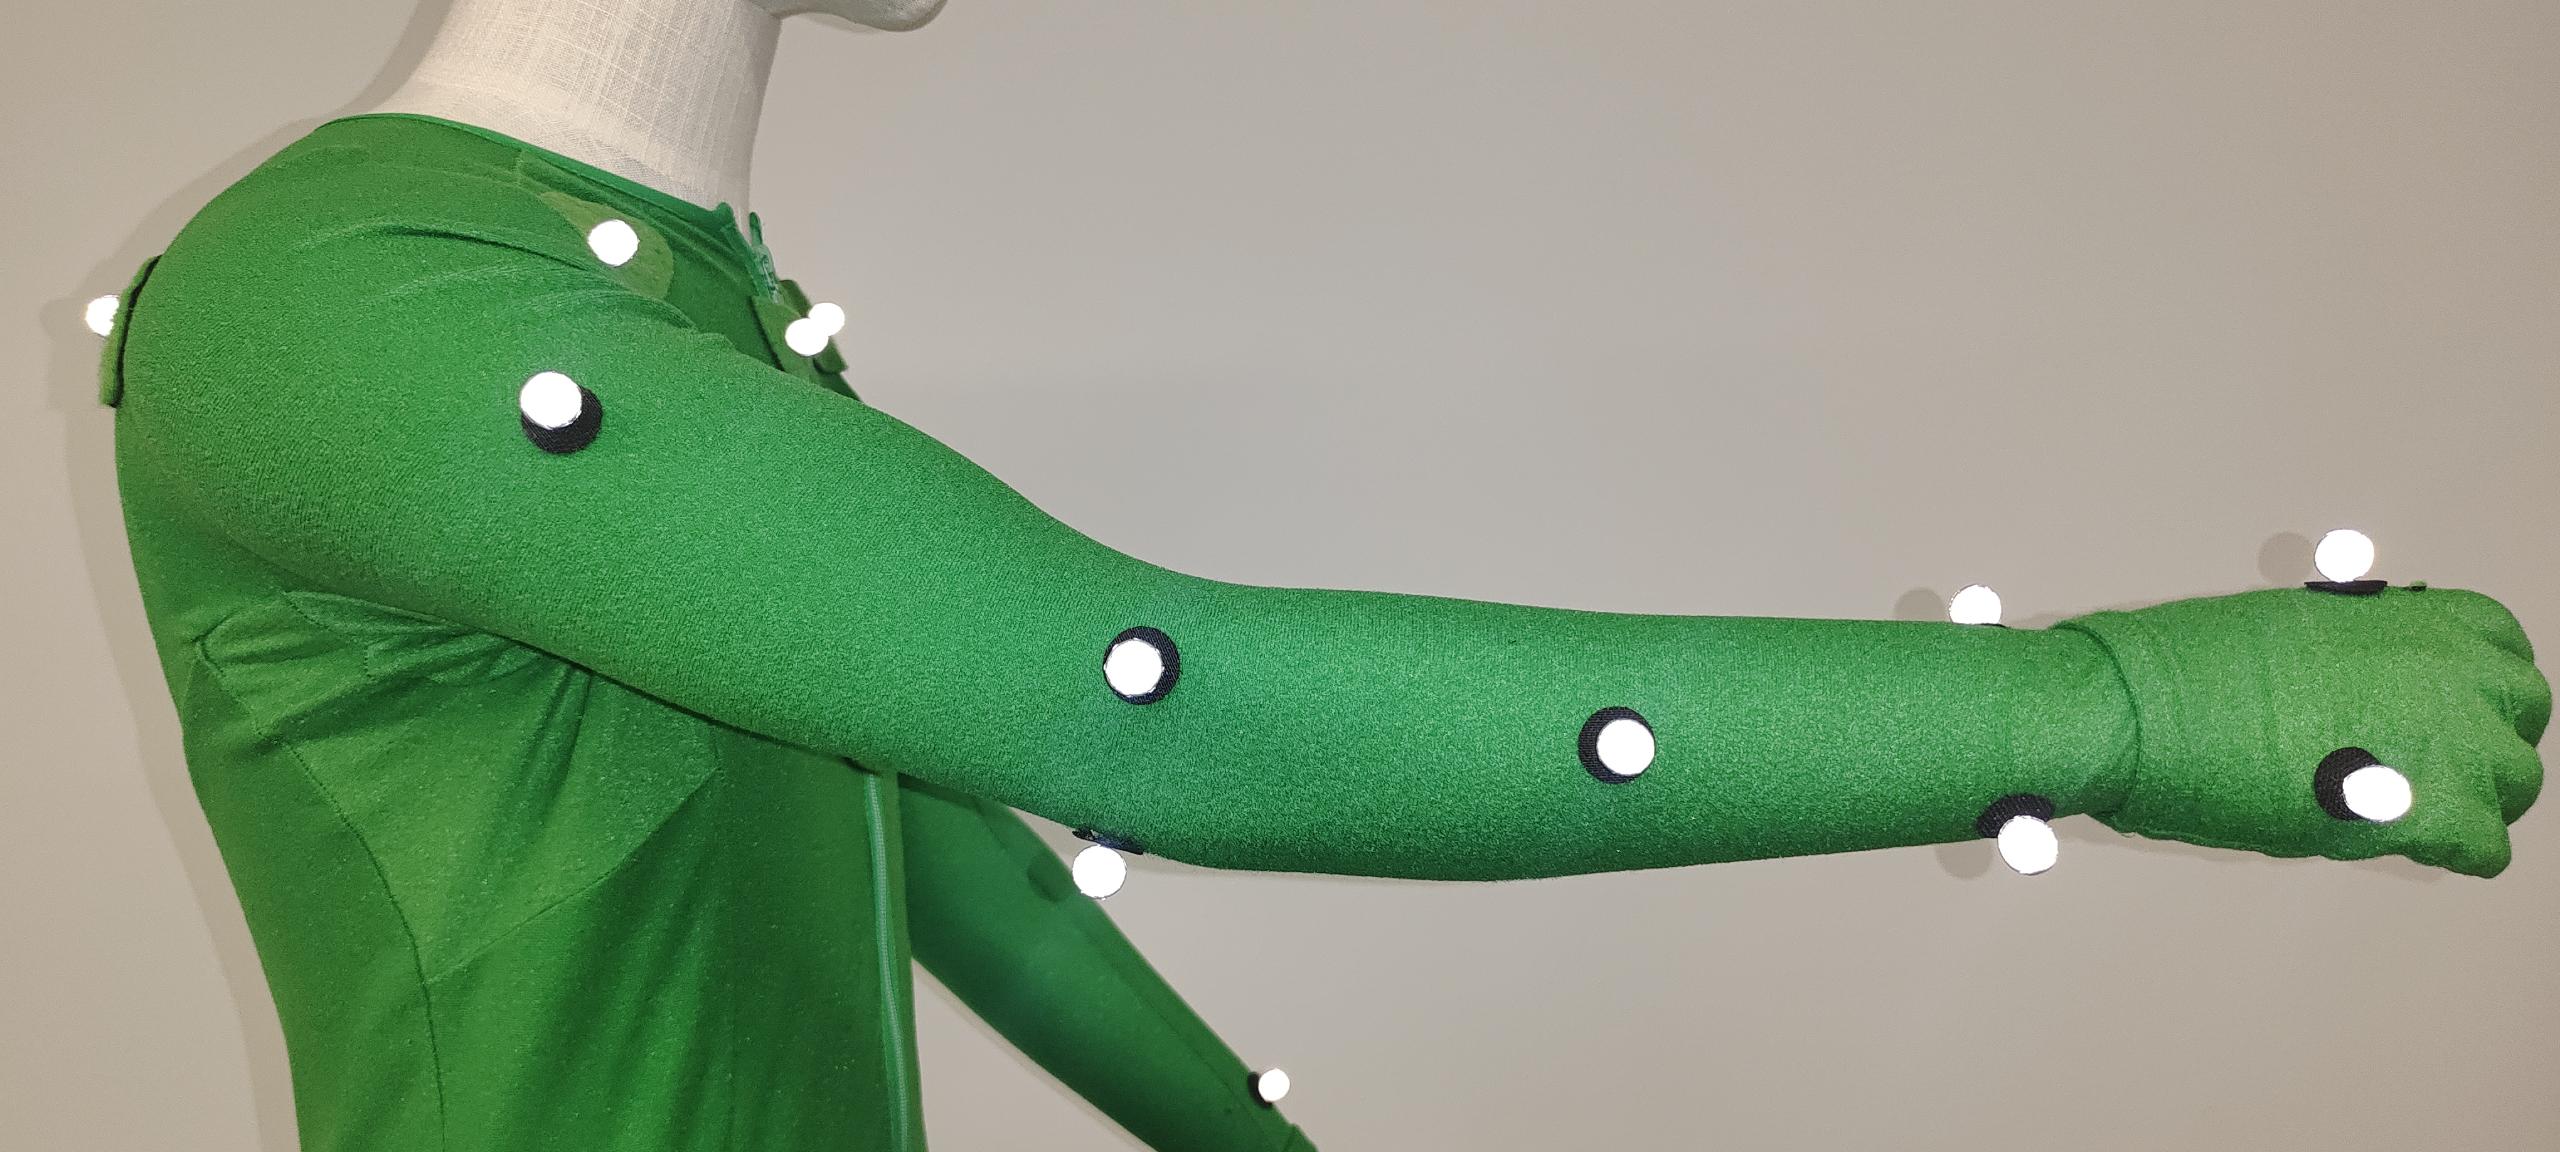
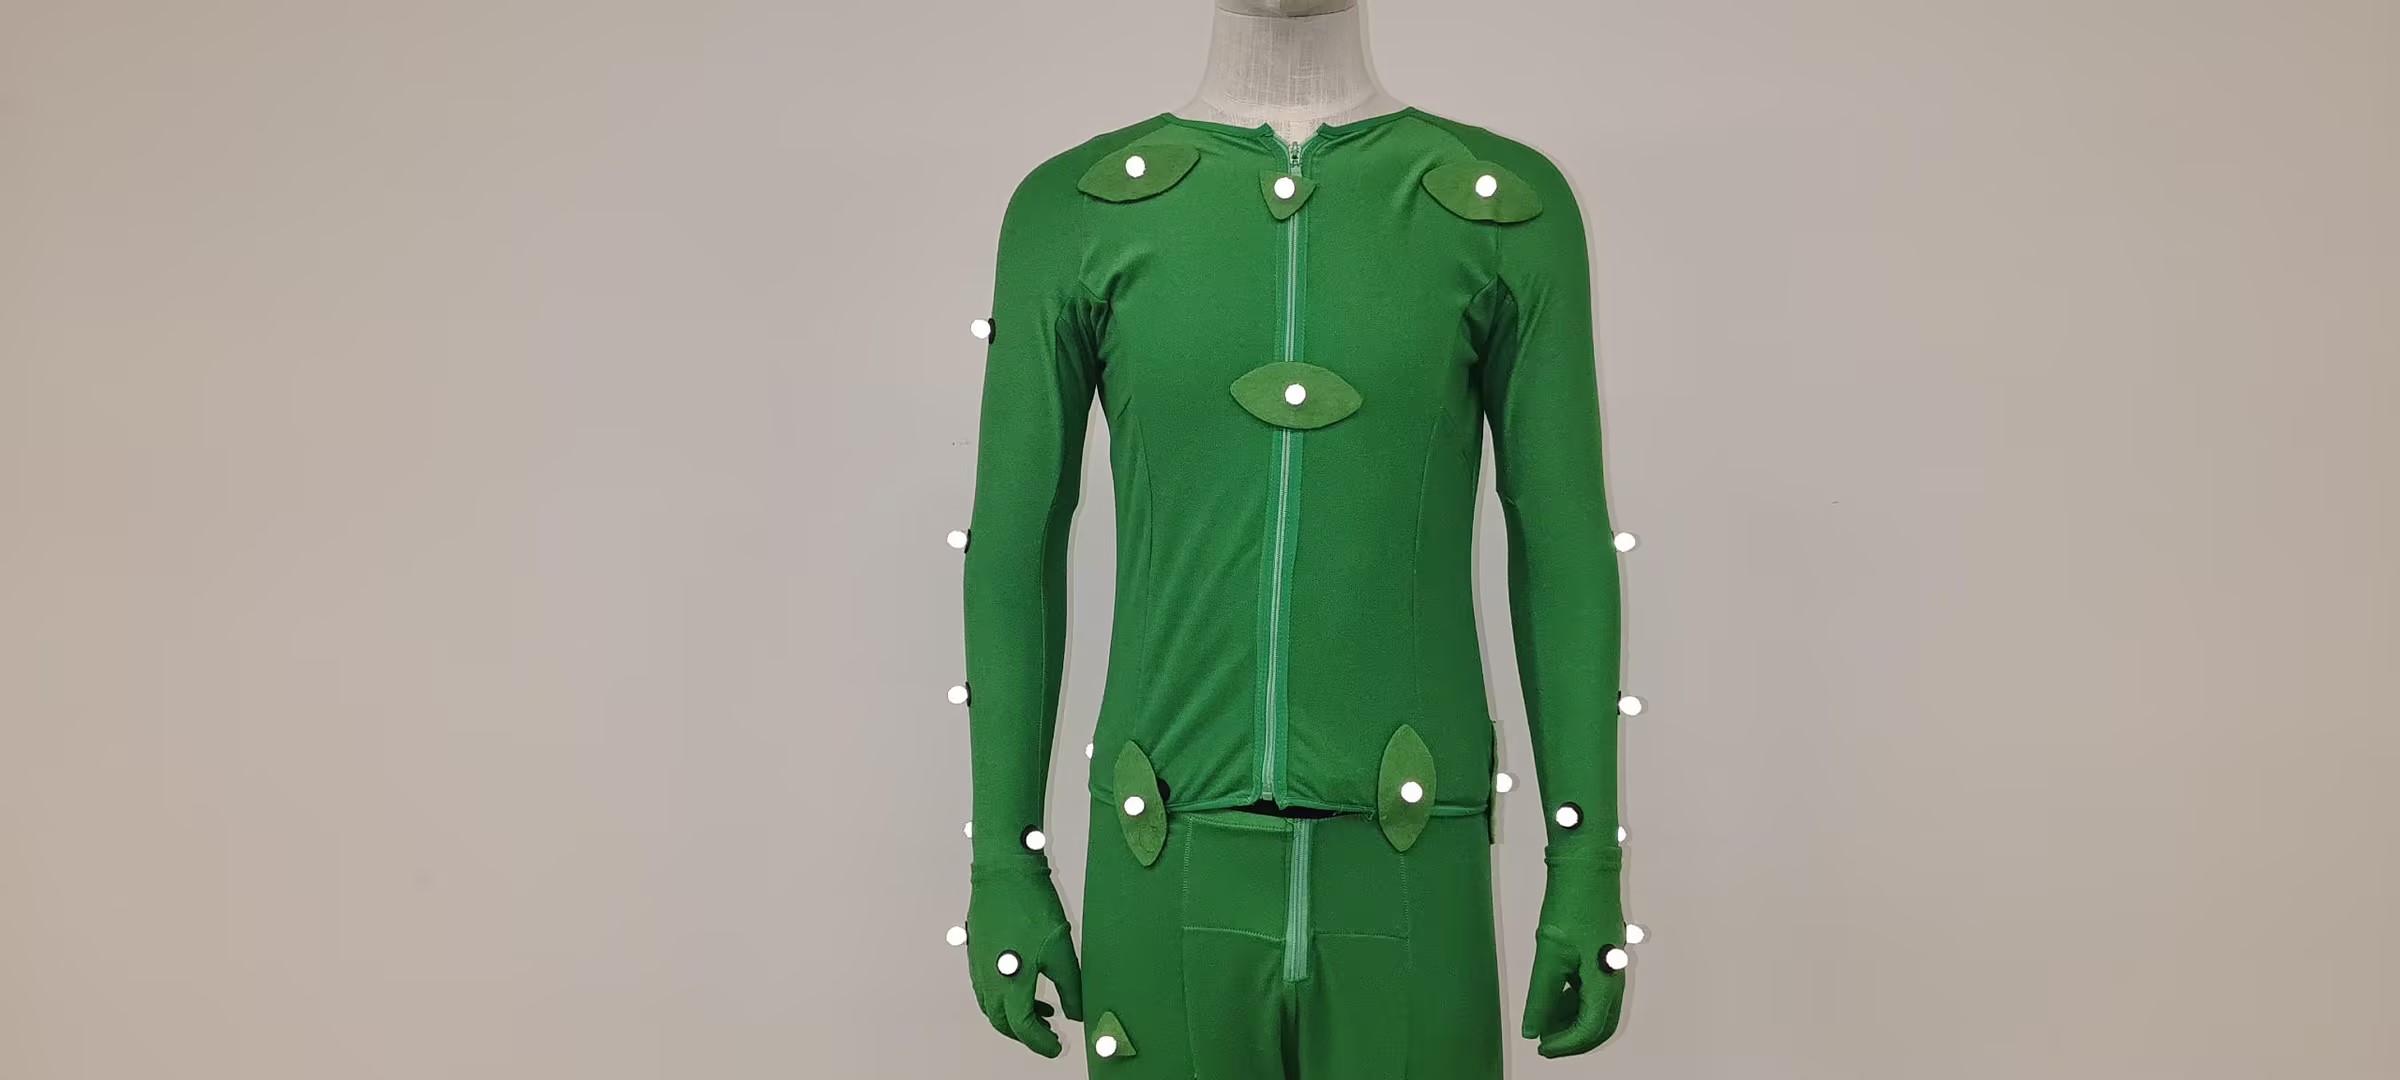
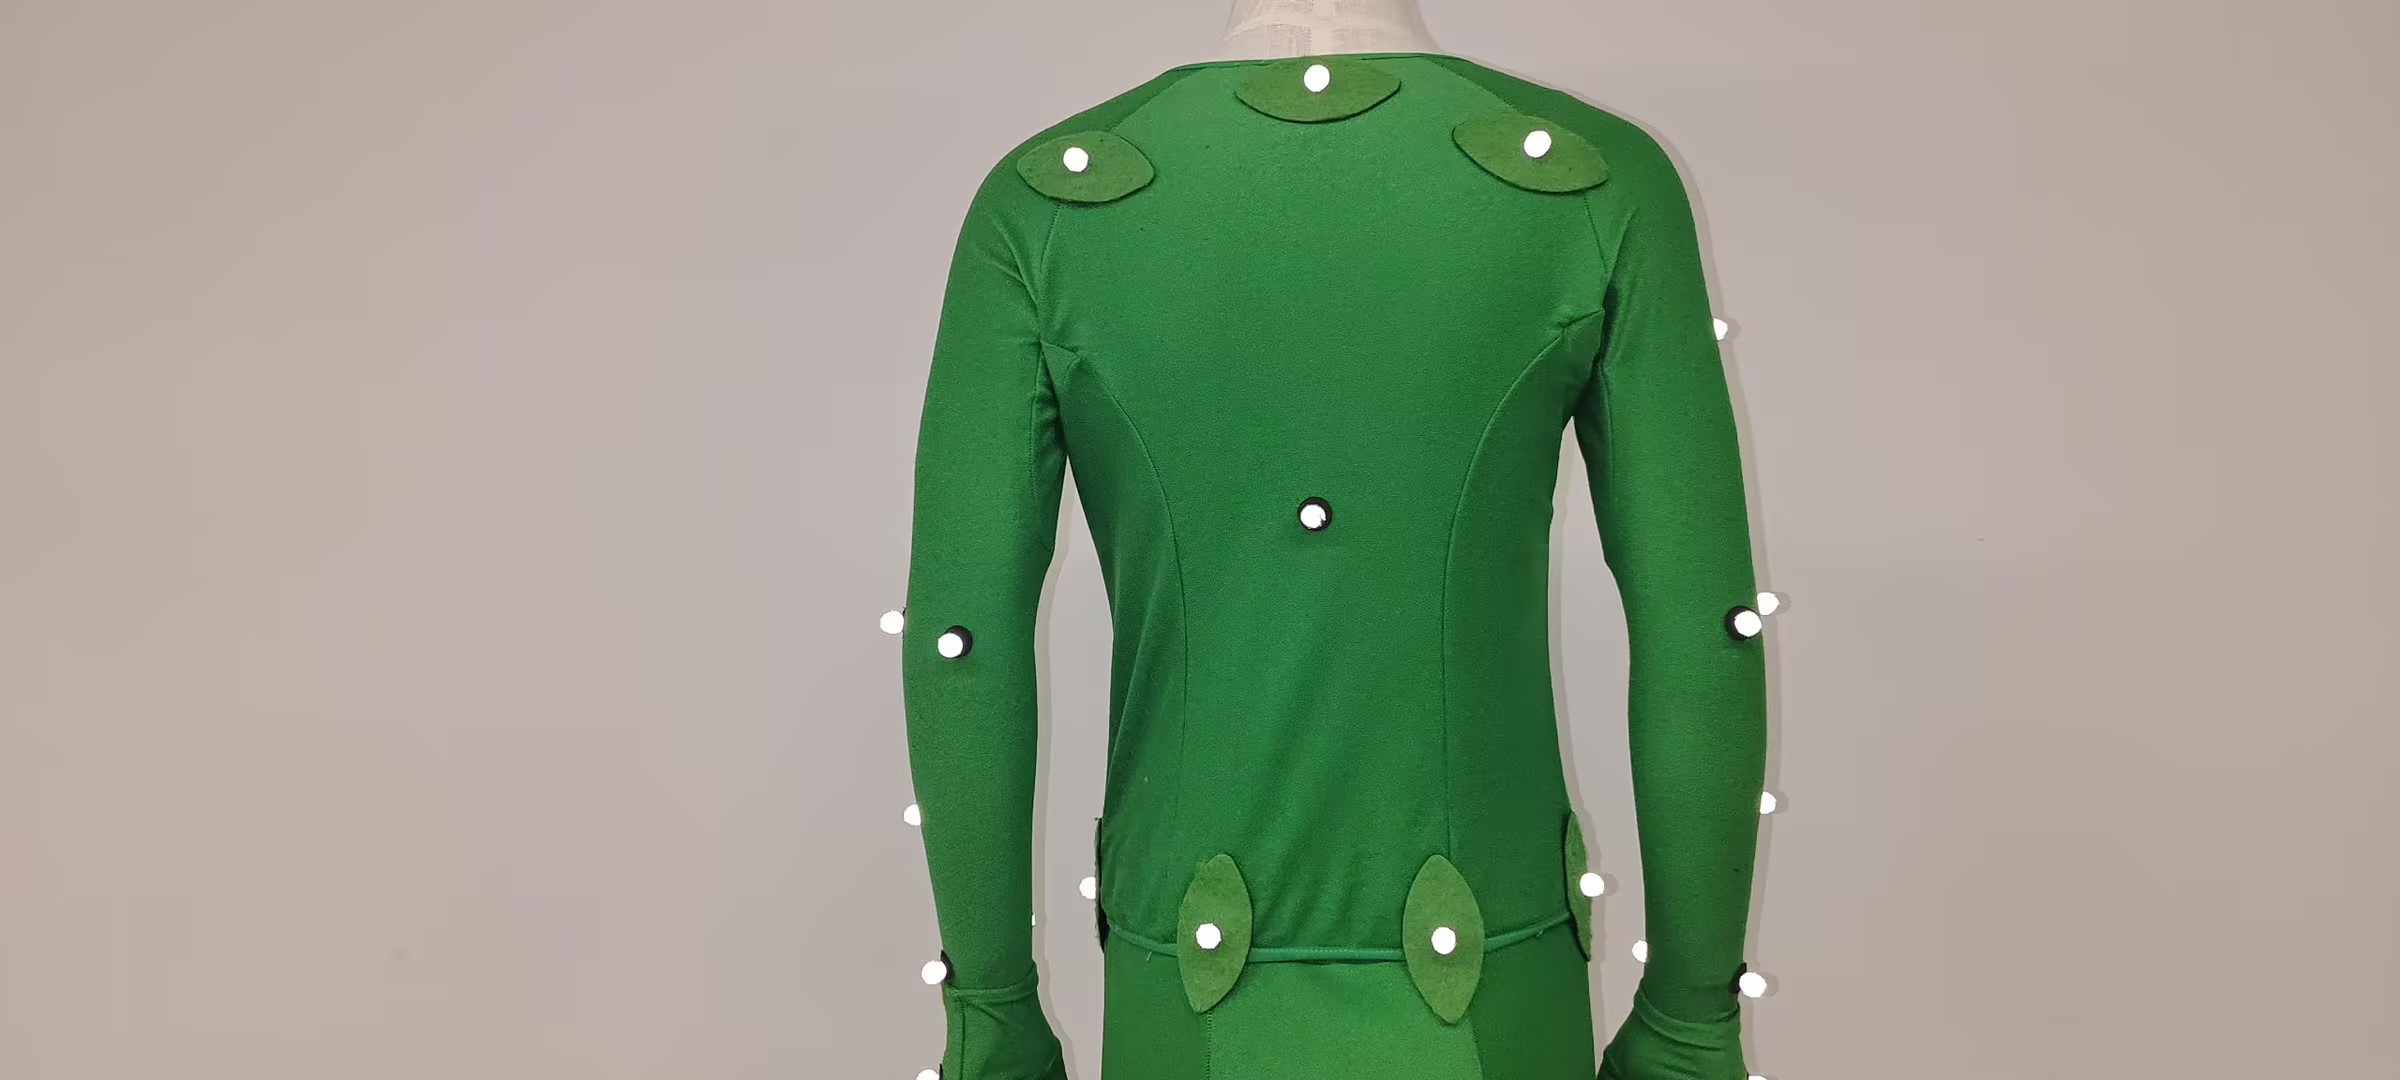
53 point schematic diagram of human body sticking points
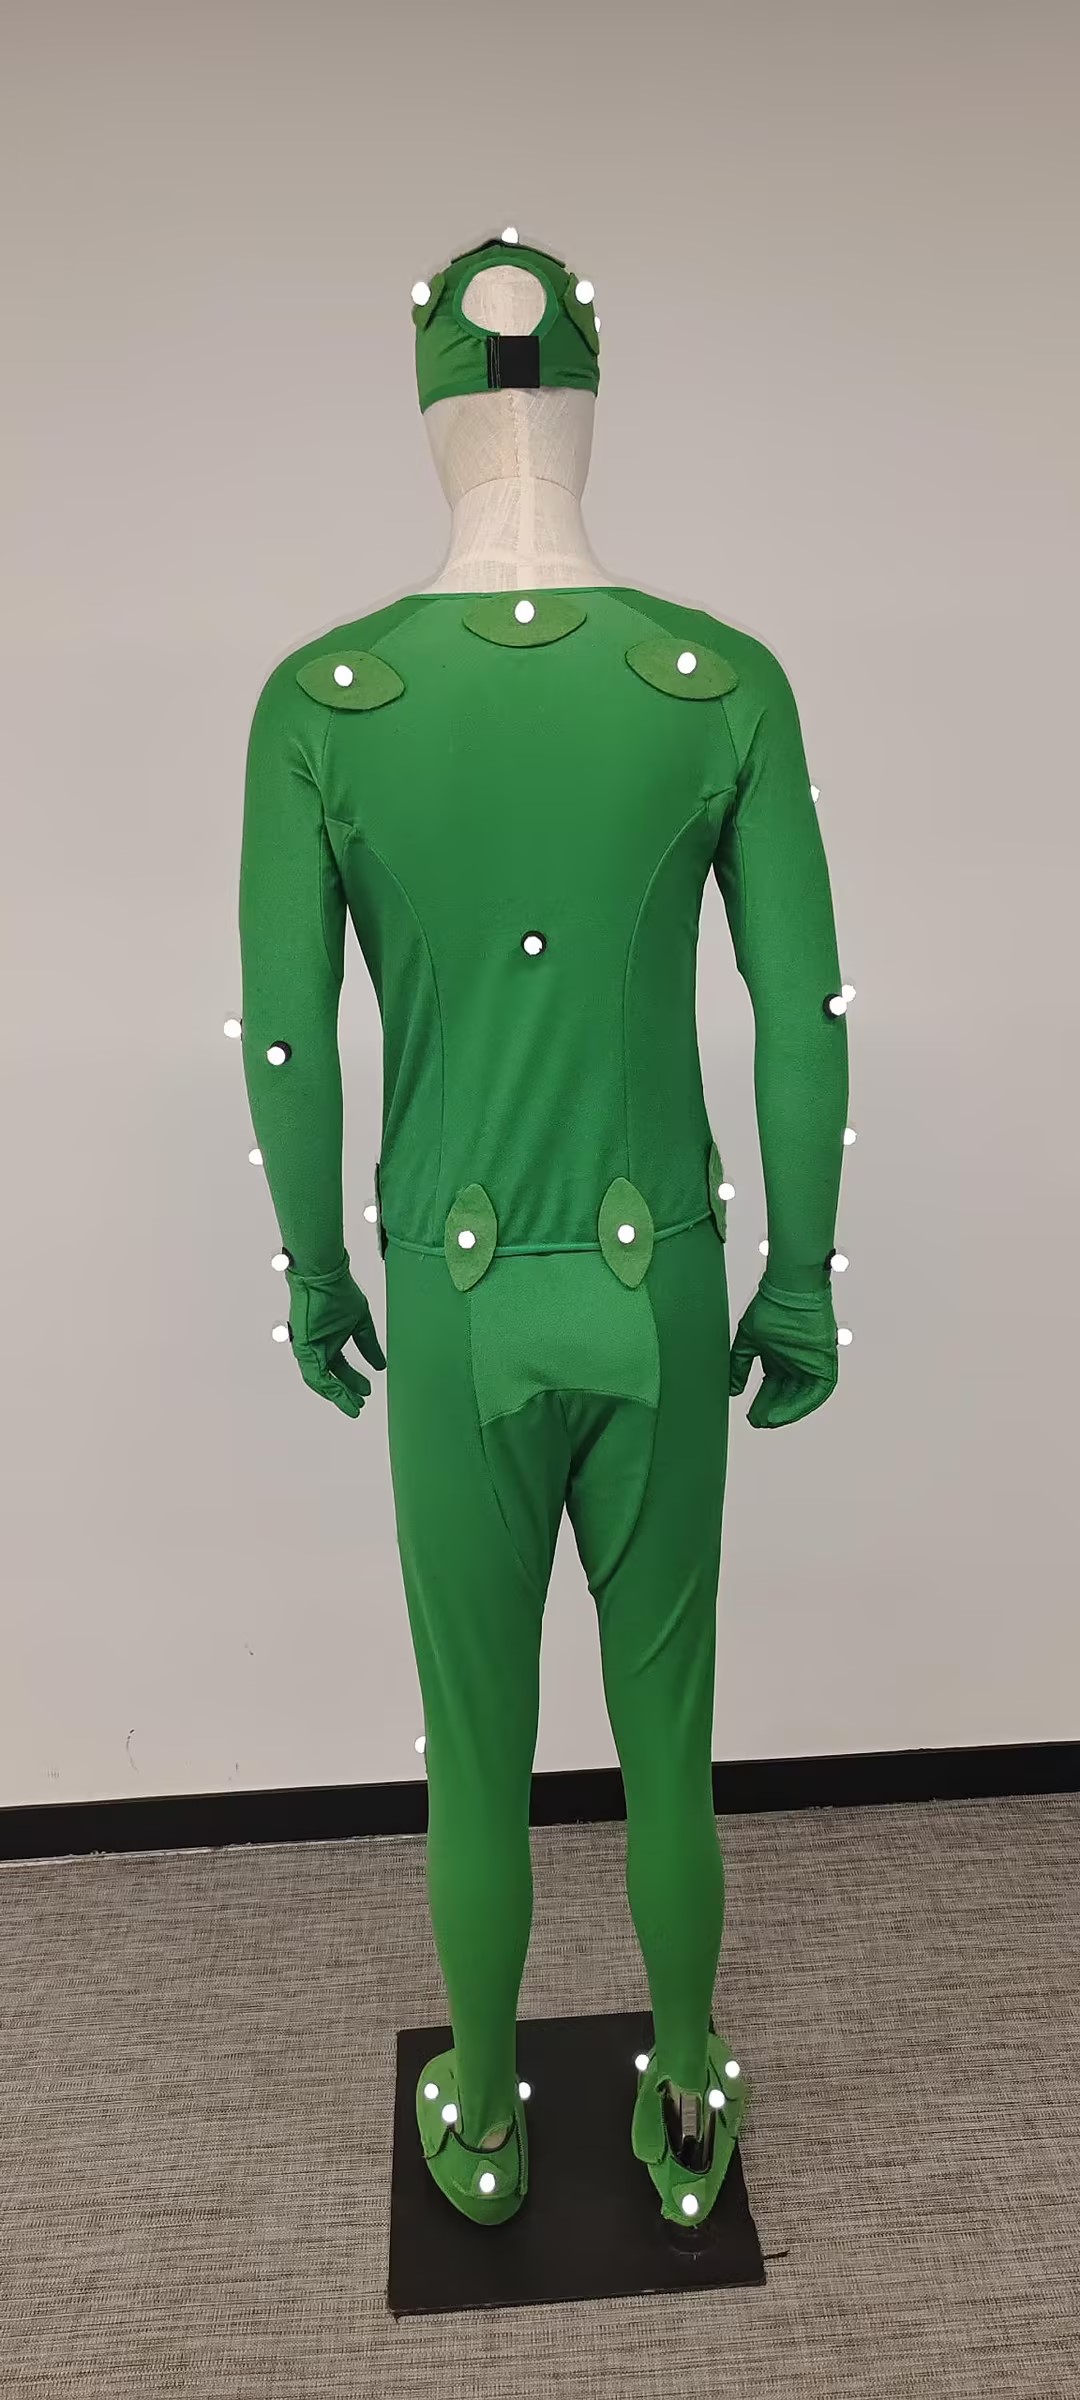
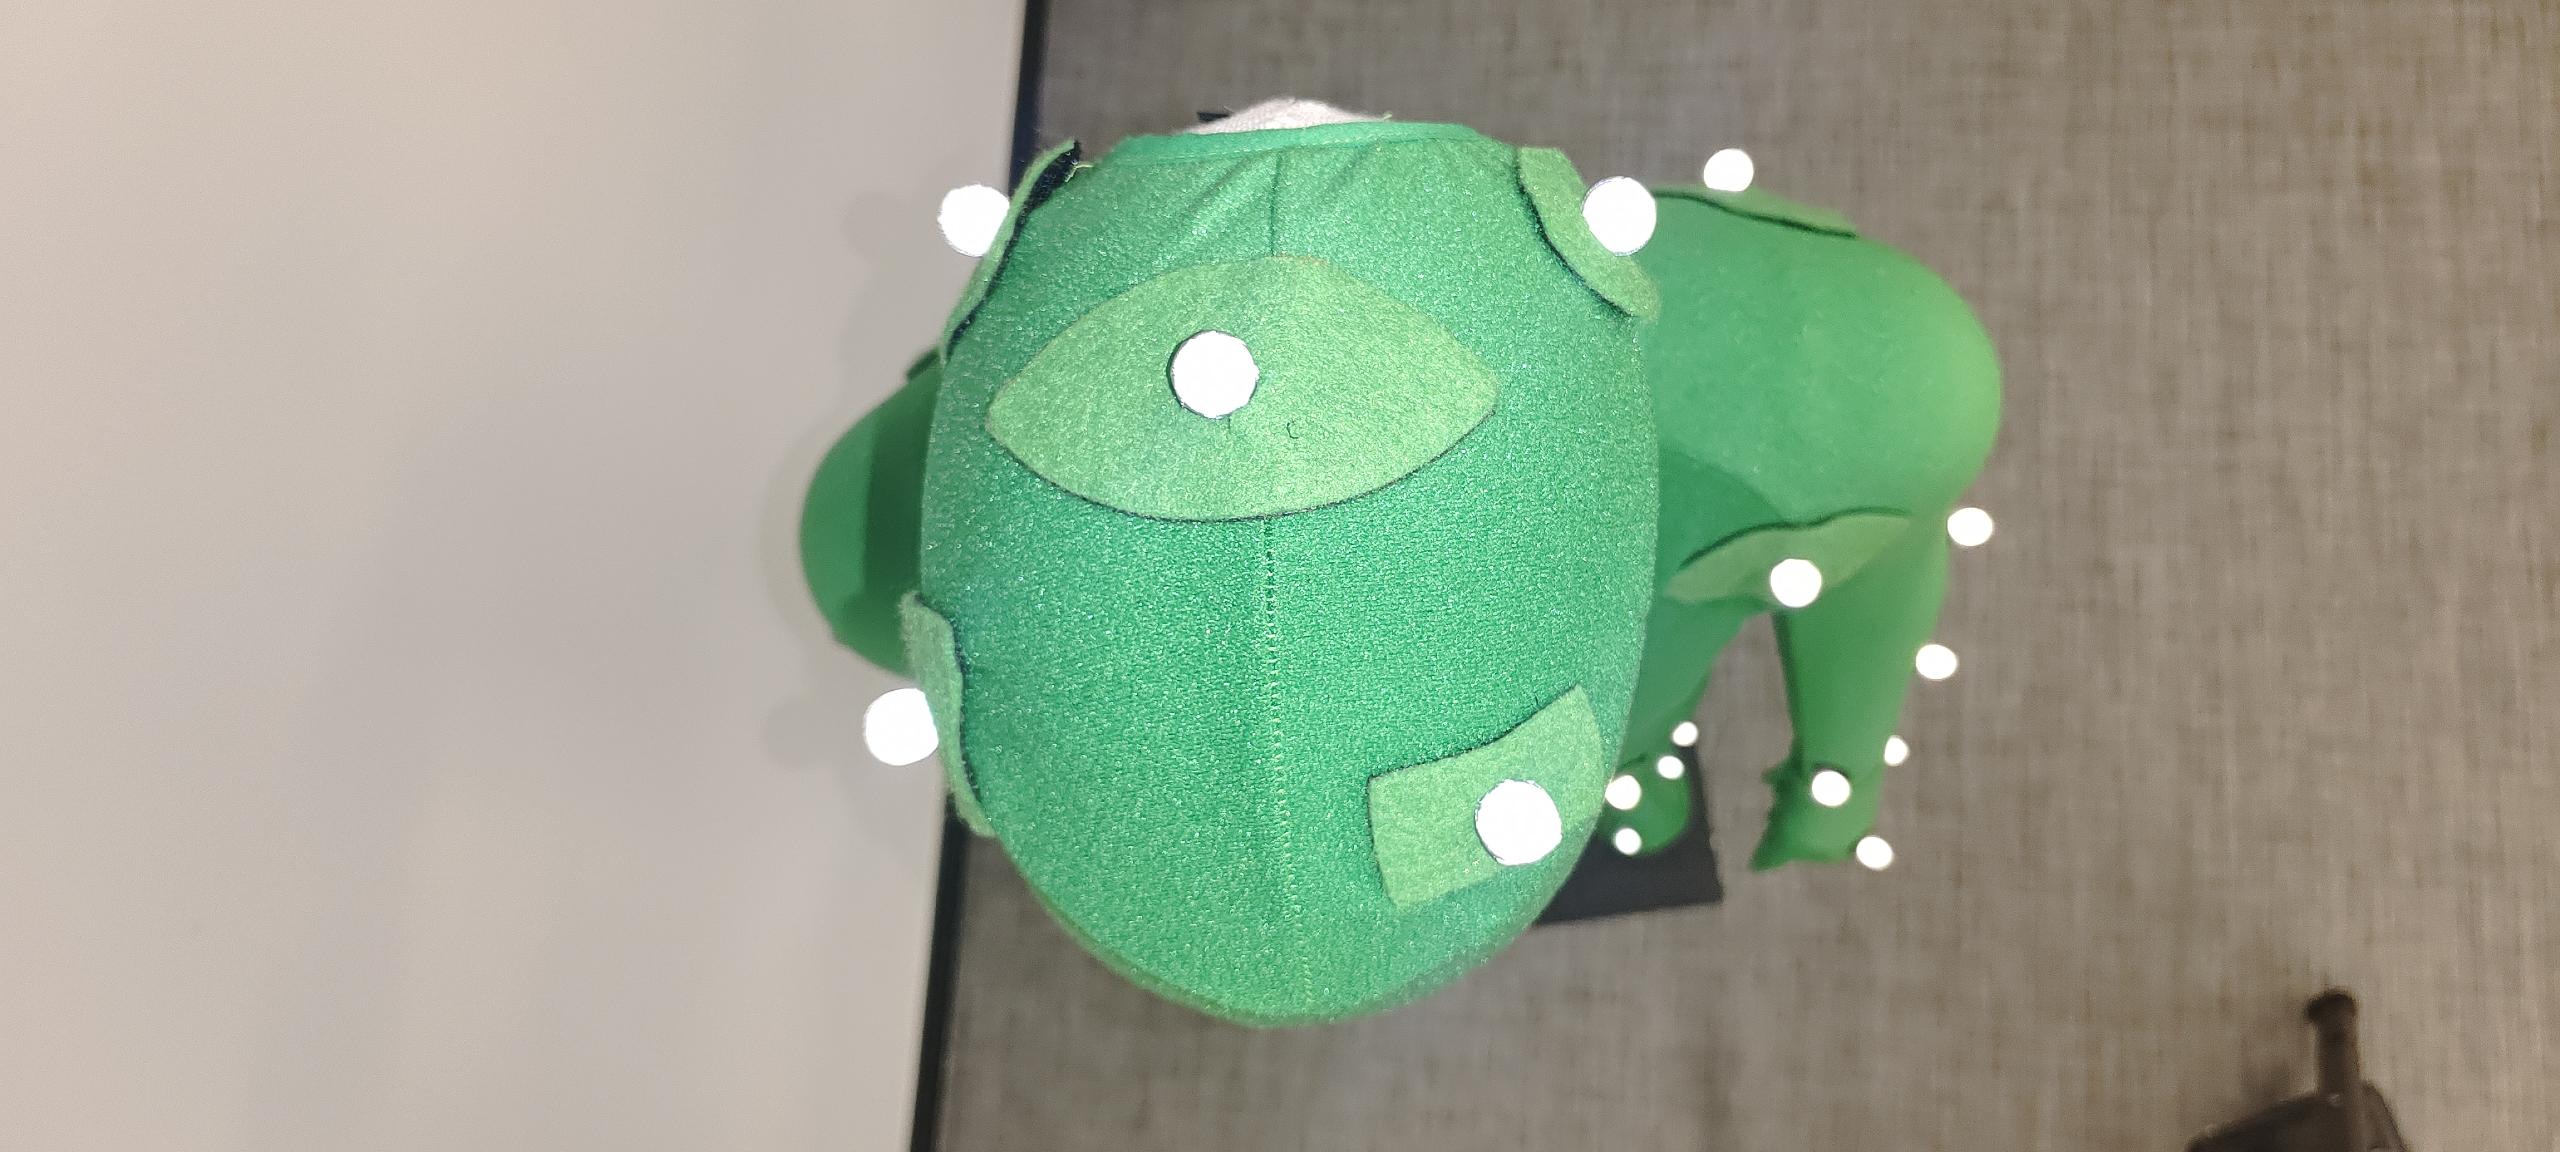
Schematic diagram of real sticking points
.jpg)

.jpg)
53 points and precautions for human body
- There are 5 points on the head: one at the highest point on the top of the head, and the other 4 points are marked in the front, back, left, and right respectively. The points on the front, back, left, and right should not be completely symmetrical, and the point on the top of the head should be offset to make it different from the other 4 points.
- There are 8 points on the upper torso: 1 point at the collar (clavicle position), 1 point at the midpoint of the front centerline (sternum), 1 point at the intersection of the spine and shoulder line (neck end), 1 point at the midpoint of the back centerline at the same level as the center of the front centerline, and 1 point at the front and back of the left and right shoulders respectively.
- There are 8 points on the upper body: 1 point on the collar (clavicle position), 1 point at the midpoint of the front centerline (sternum), 1 point at the intersection of the spine and shoulder line (neck end), 1 point at each midpoint of the back centerline in the same horizontal plane as the center of the front centerline, and 1 point at the front and back of the left and right shoulders.
- There are 6 points at the waist: 2 at the front of the hips, 2 symmetrically at the back and front with the rear point slightly higher than the front point, and 1 on each side asymmetrically, with one slightly forward and the other slightly backward.
- Legs: 8 points, with 1 point on the outer side of the mid-thigh, positioned slightly higher on the left thigh and slightly lower on the right thigh for asymmetry. Knees: 2 points, with one point placed on the outer side of the knee and the remaining point placed in the middle of the knee to prevent obstruction. Lower Left Leg: Point positioned slightly above and towards the outer side of the midsection. Lower Right Leg: Point positioned slightly below and towards the outer side of the midsection.
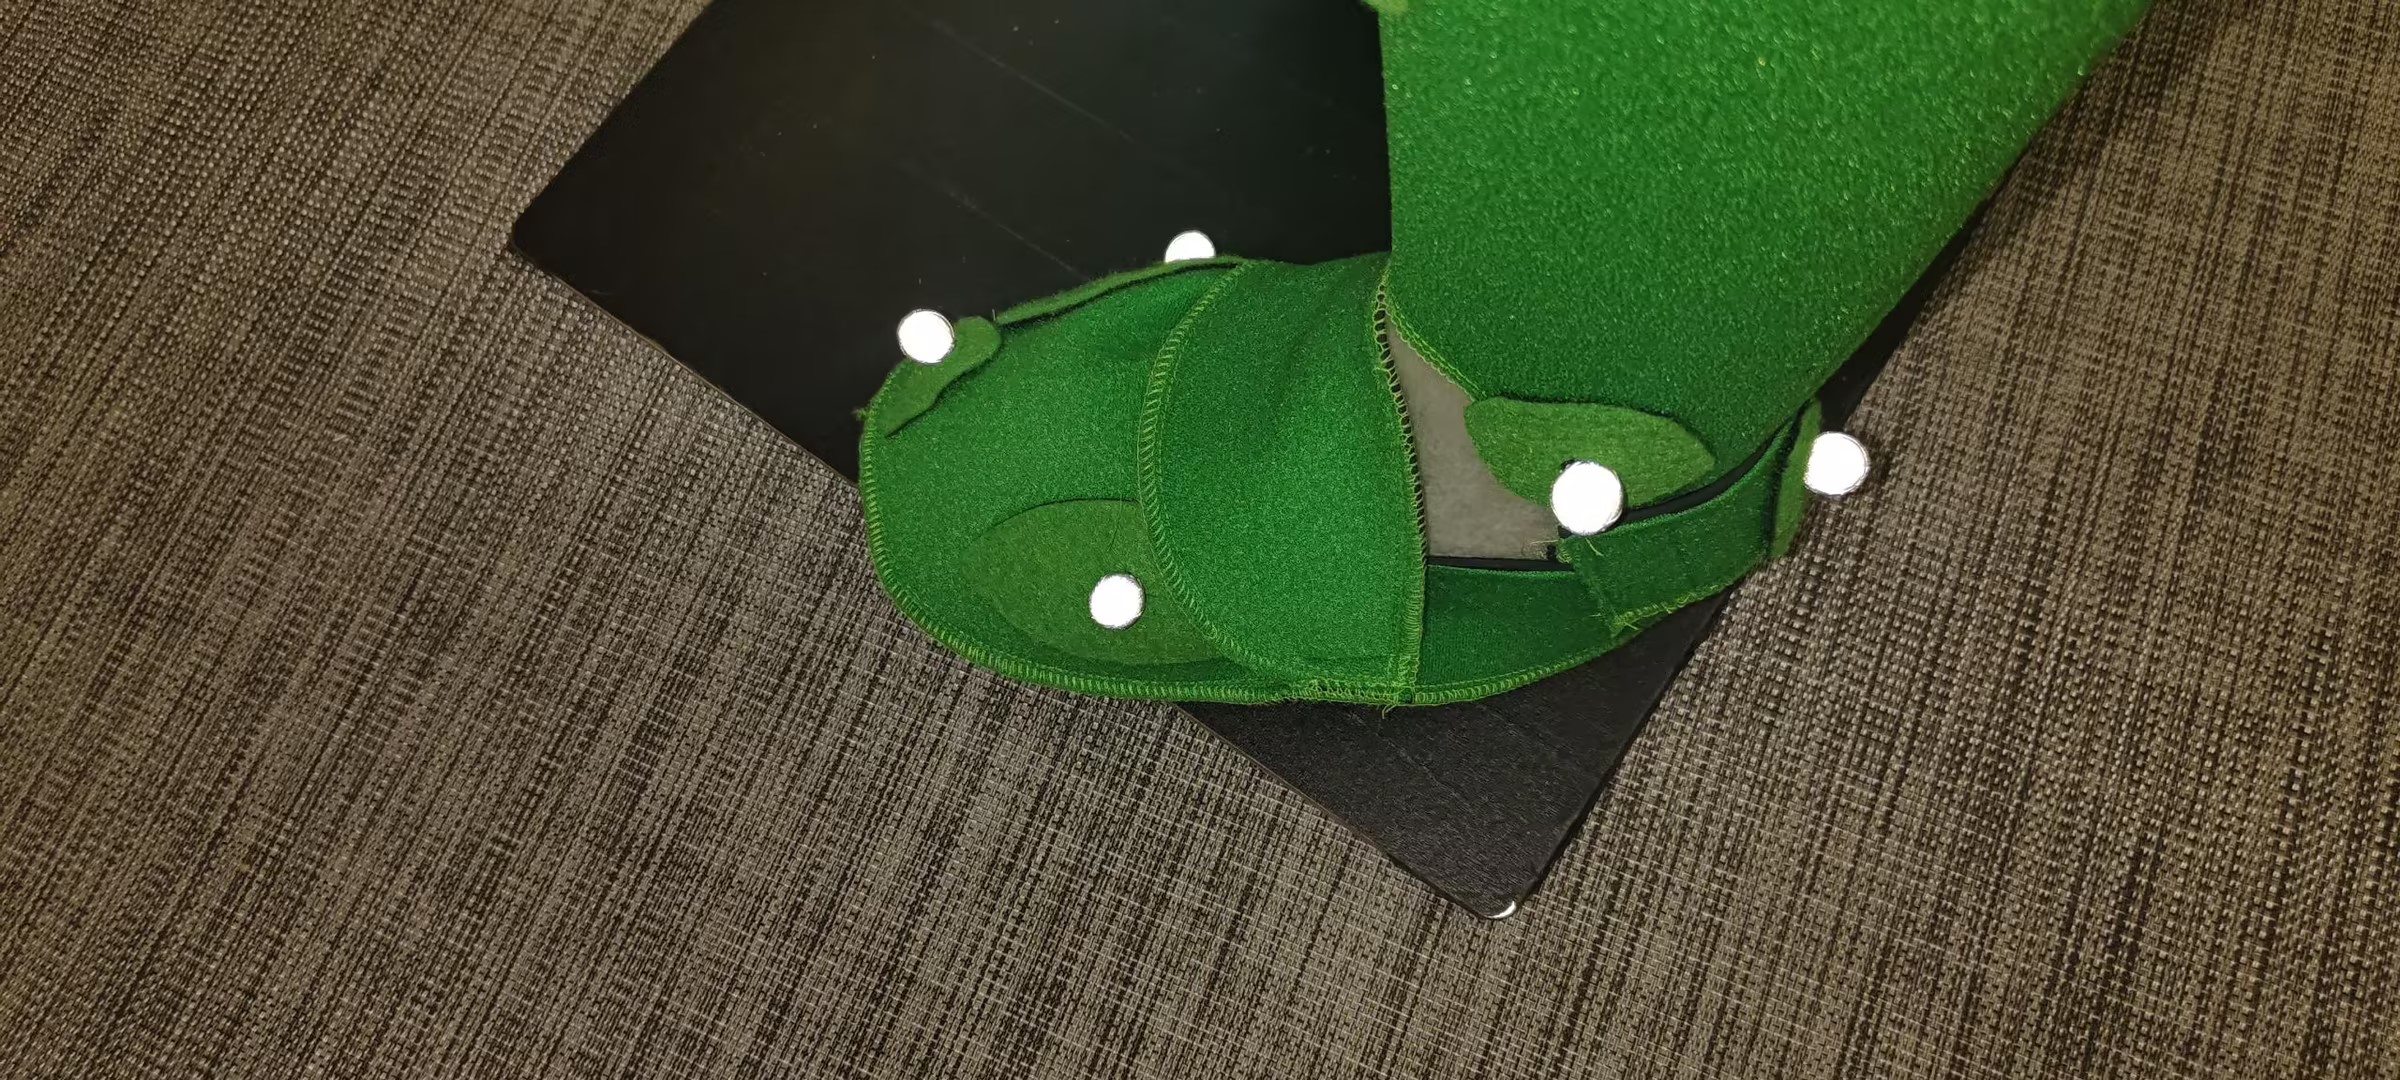
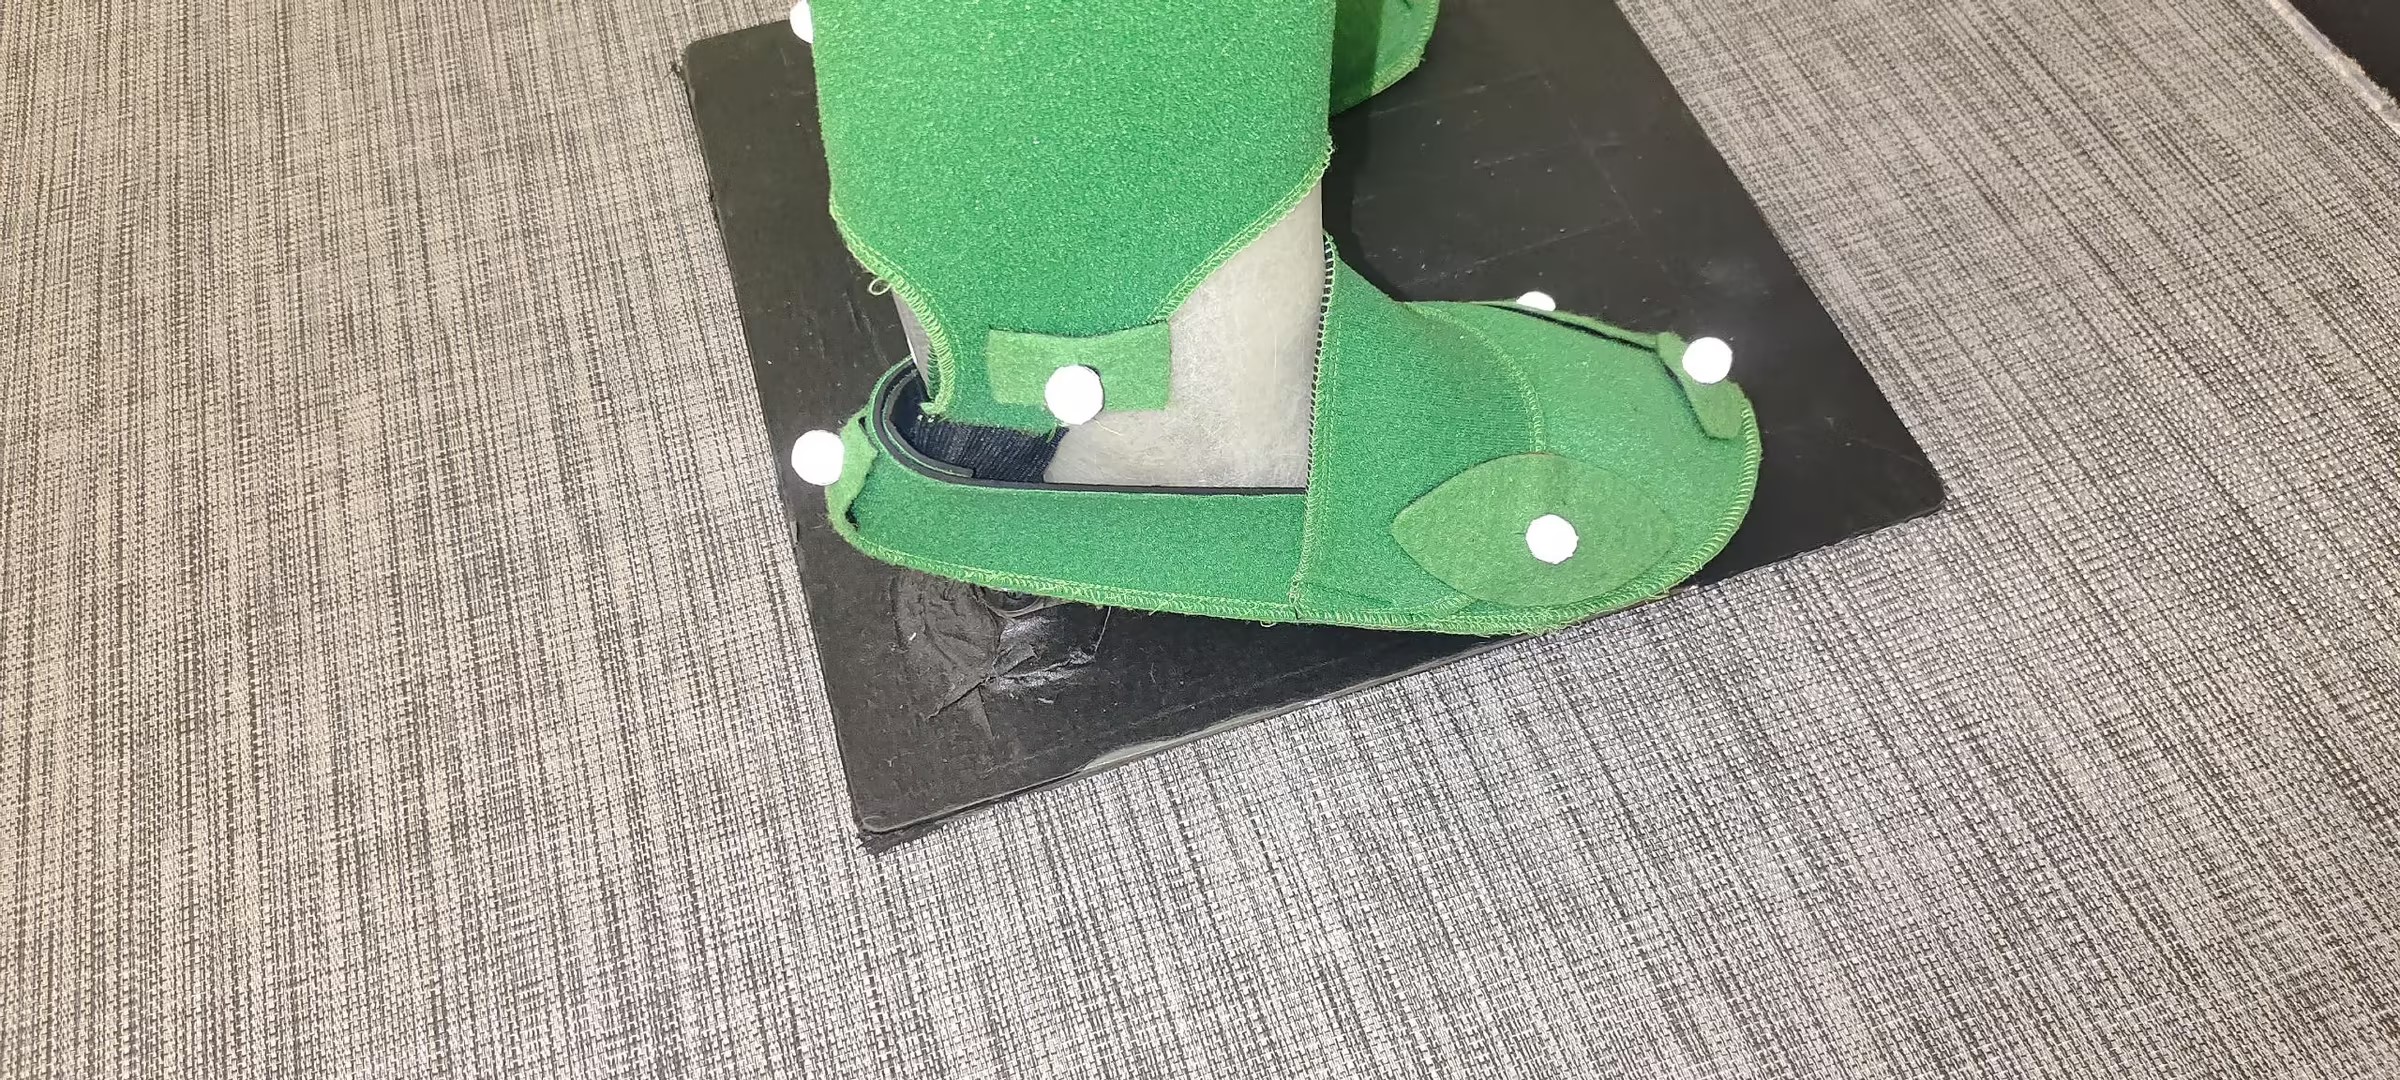
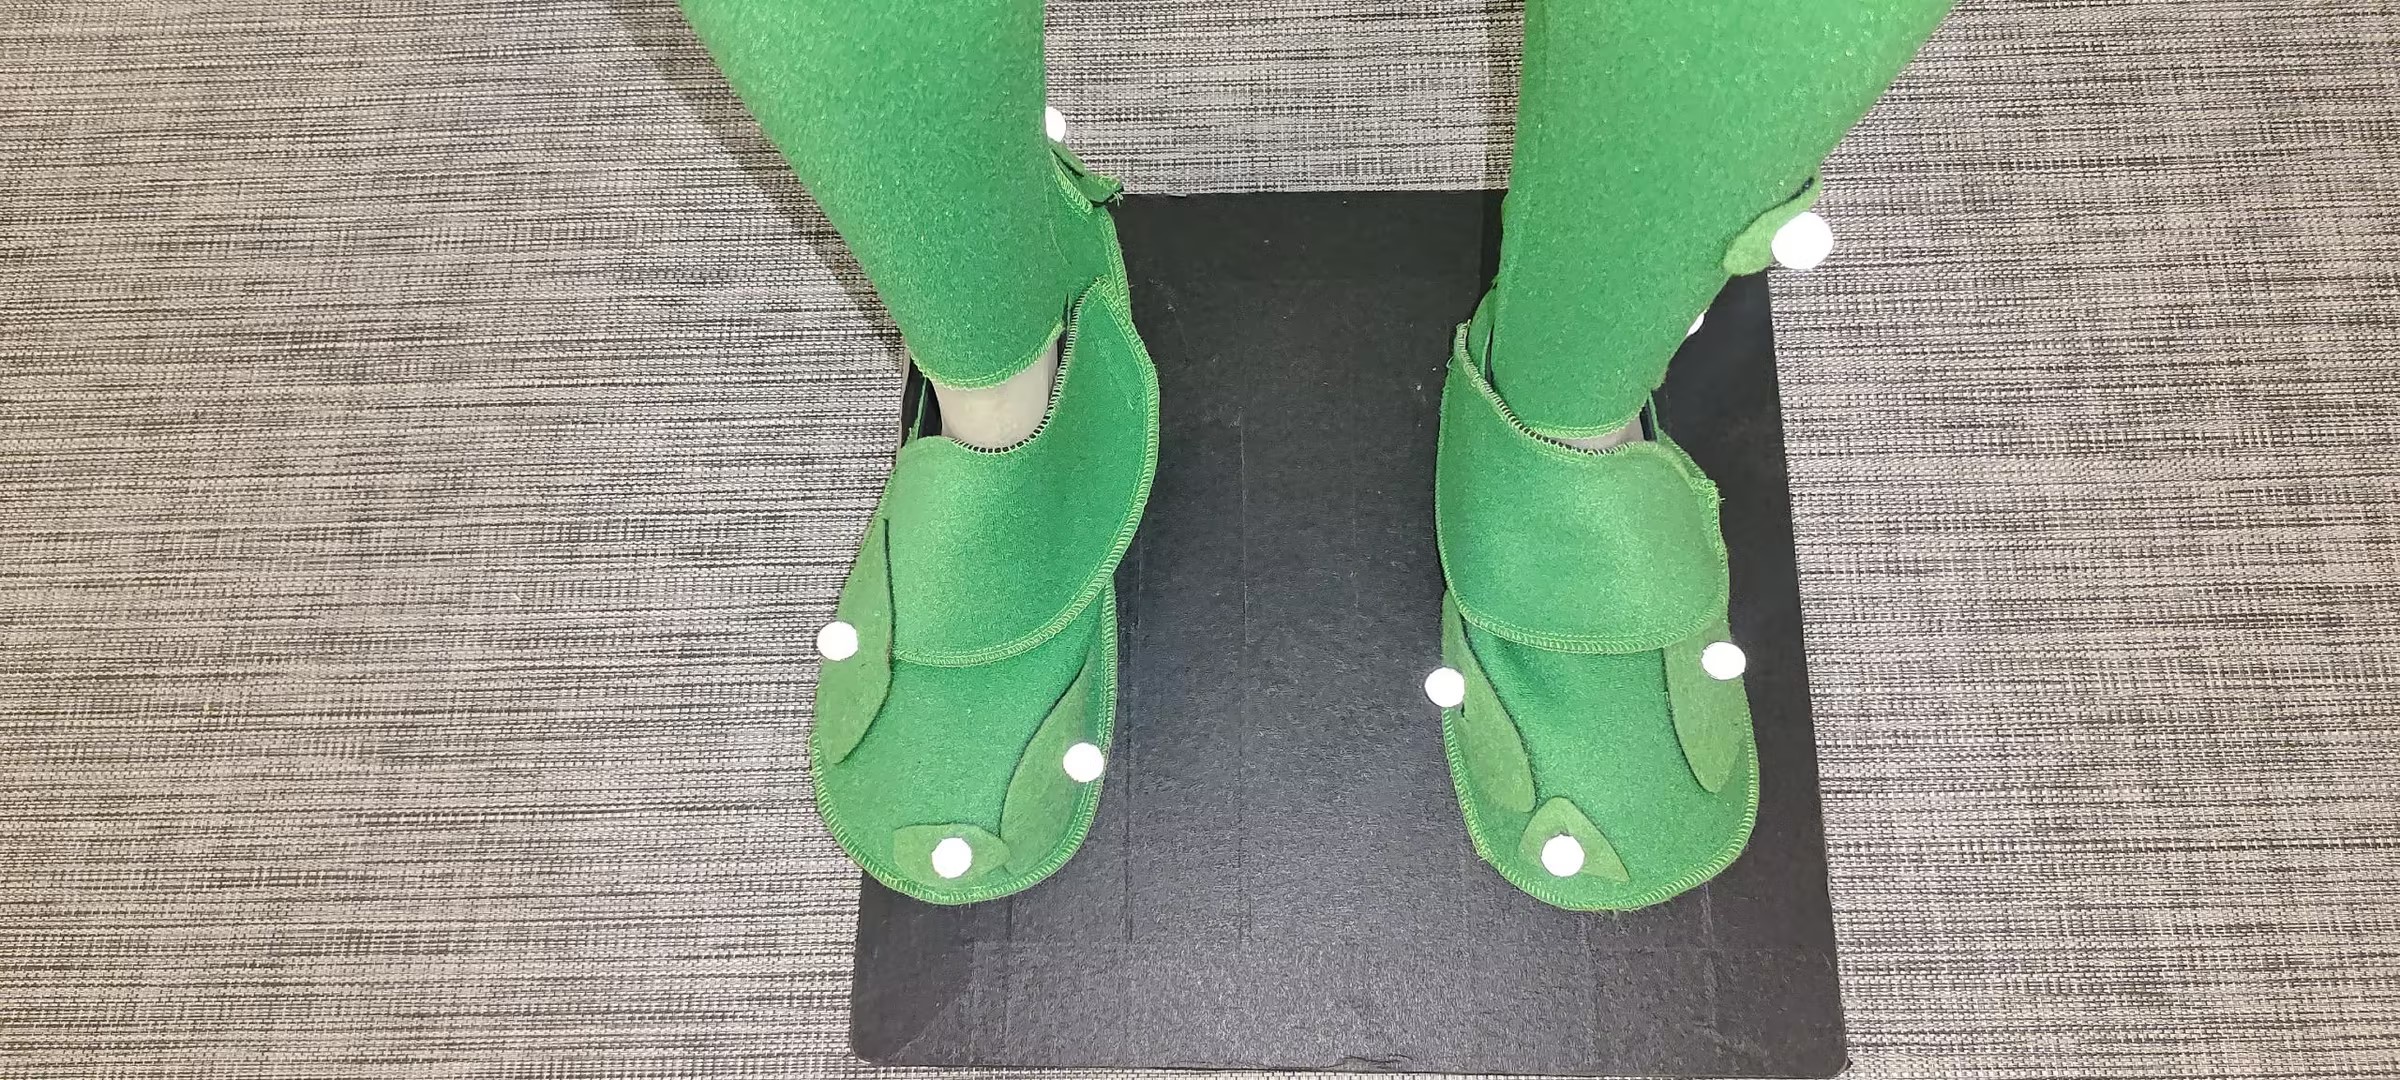
- There are 10 points on the feet.One marker in front of the front foot, two at the bending joint of the front foot (ensuring that the inner marker is farther forward than the outer marker), one at the ankle, one at the heel, and the two markers on both sides of the front foot should be on the same plane.Maintain the same height of the attachment points on both sides of the left and right ankles and front soles as much as possible.
- If there is an issue with the occlusion of the elbow joint marker, place the inner elbow joint marker slightly above the elbow joint, behind the arm, rather than inside the elbow joint.
- Keep the height of the attachment points on the left and right waists, knees, and ankles as consistent as possible.
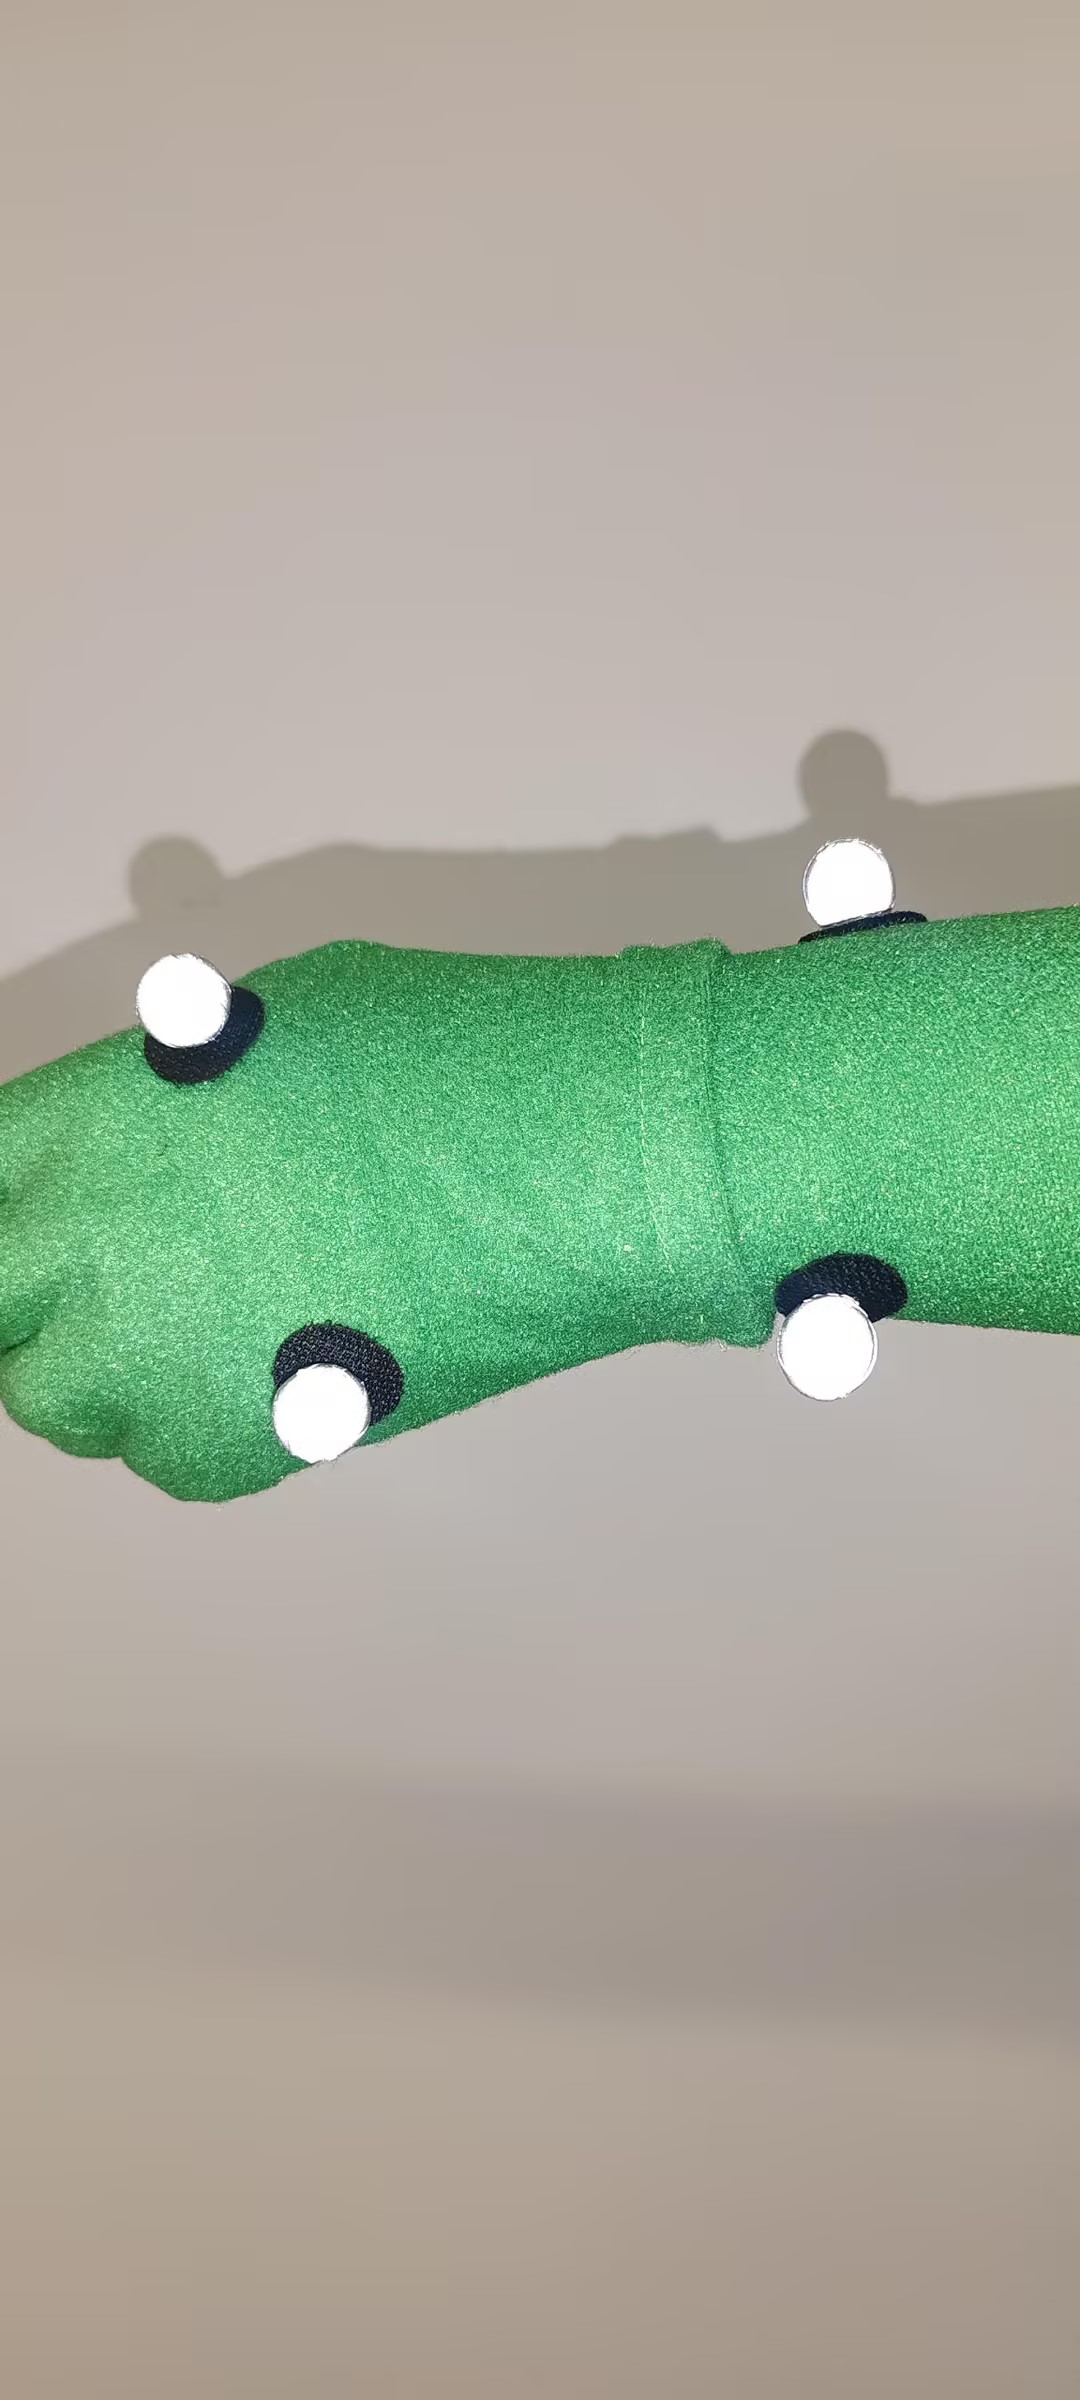
- When flipping the wrist and forearm, if recognition is not possible, check and adjust the attachment points of the forearm. Each point on the left and right forearms is asymmetrical, with one point in the middle of the left forearm and one point in the middle of the right forearm, both located on the outside. Do not attach them in the middle. When attaching points in this area, the actor can bend their arms upwards and place them on their shoulders to adjust the attachment points of the forearm. The distance between the attachment point on the forearm and the inner attachment point on the wrist (WristIn) should be greater than the distance between the attachment point on the forearm and the outer attachment point on the wrist (WristOut).
- Secure areas that are prone to loosening and wrinkling with straps, such as the waist, upper arms, wrists, and palms.