Download the latest plugin version "NOKOV-MobuPlugin.XXX.exe, " which is compatible with MotionBuilder 2018-2022.
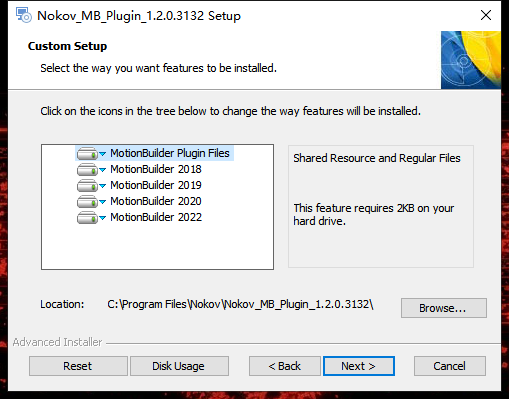
Extract the plugin installer package, double-click the extracted plugin, and install it into the software directory.
After the installation completes, click Finish to finalize the plugin setup. (The application of the glove human body
in MotionBuilder is the same as below.)
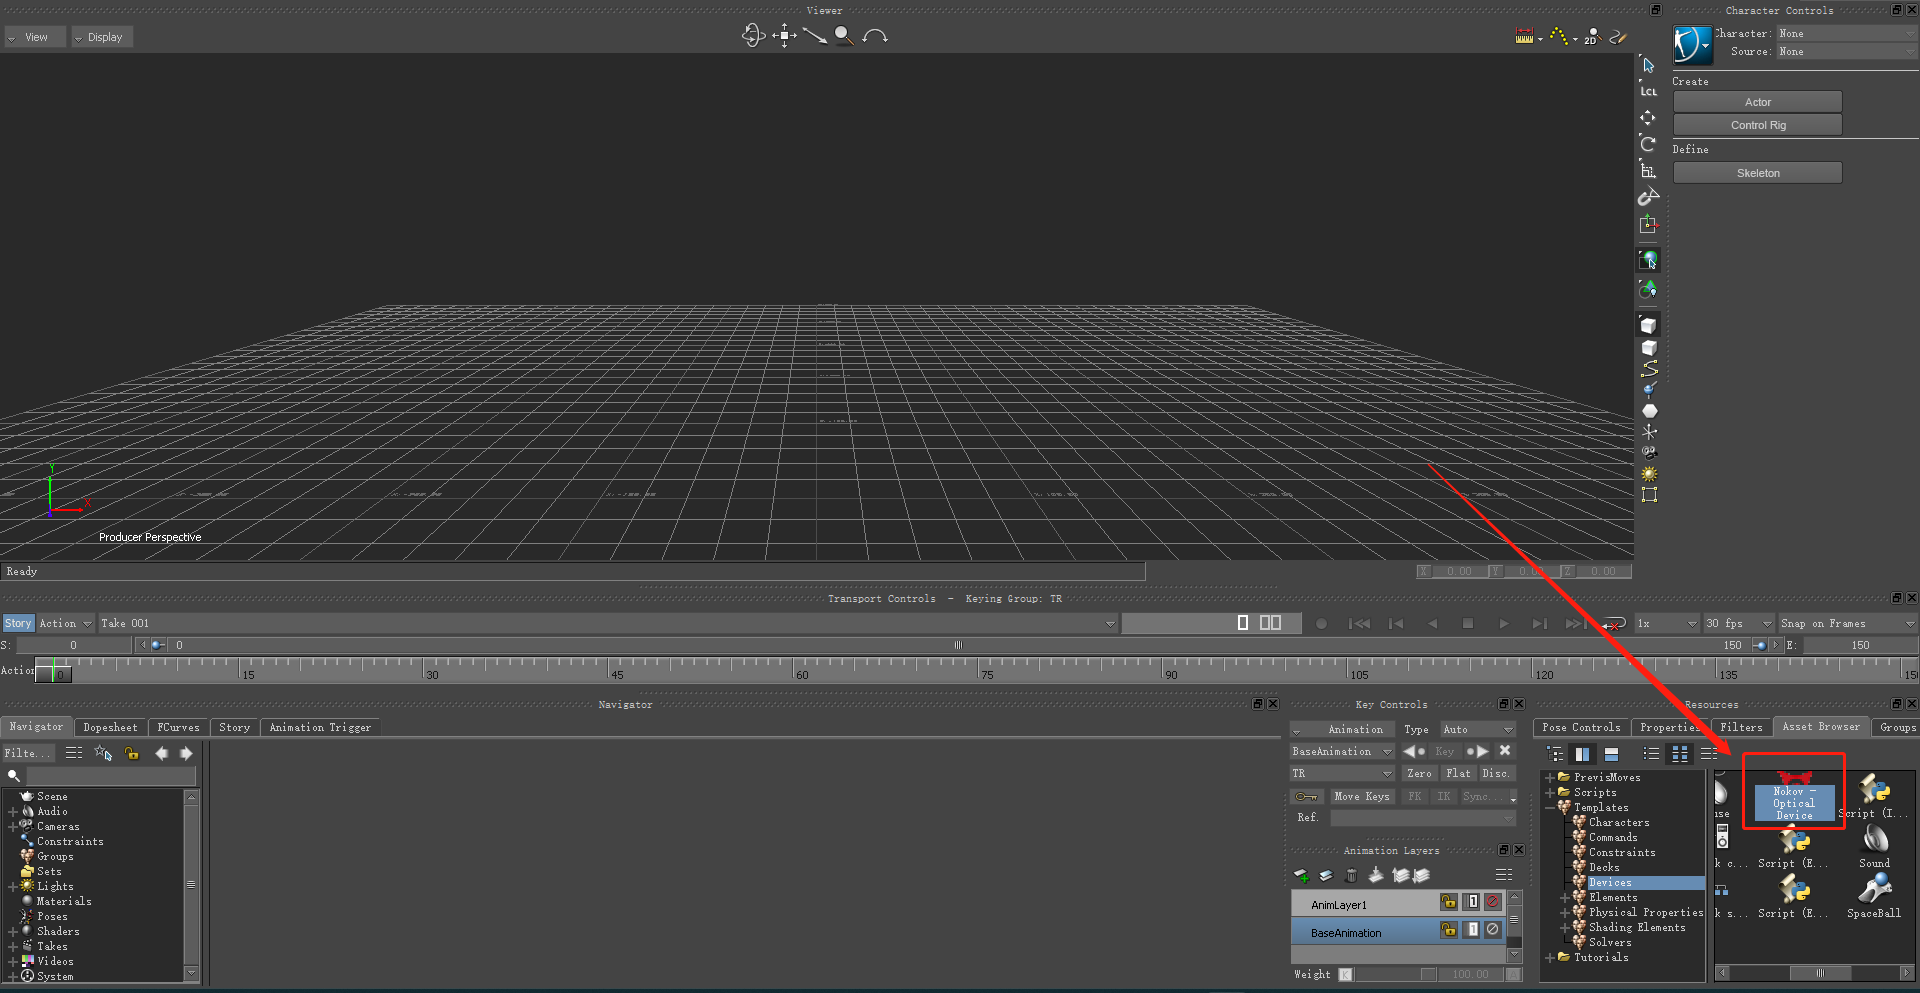
Open MotionBuilder, click on "Resources—Asset Browser—Devices, " find "NOKOV-Optical Device, " and drag it into the
Viewer window.
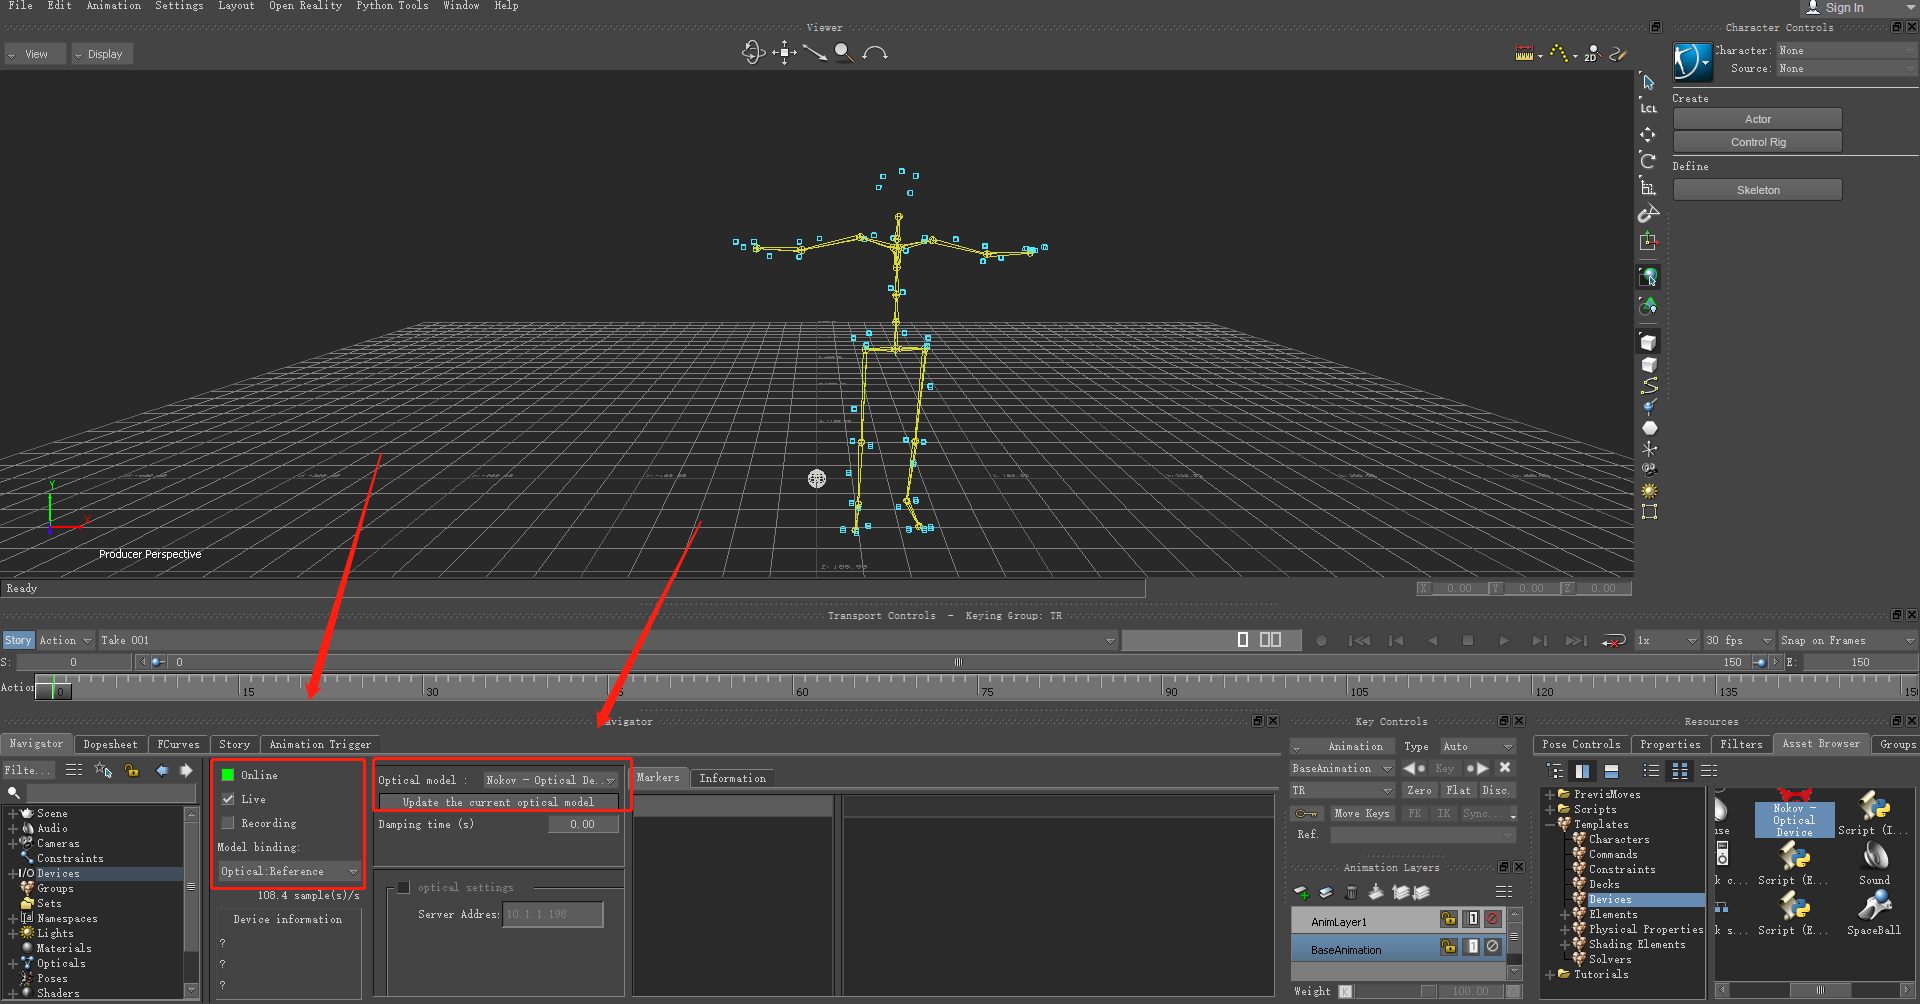
Click the Online button in the interface at the bottom: "Navigator—I/O devices—I/O Seeker - Optical Device" to enter
Live status. Click "Model binding, " choose the Create button, and under "Optical model, " click "Generate a new
optical model." After playing, uncheck and recheck Live. Then, move the human body in XINGYING software, and the
model in MotionBuilder will move in sync.
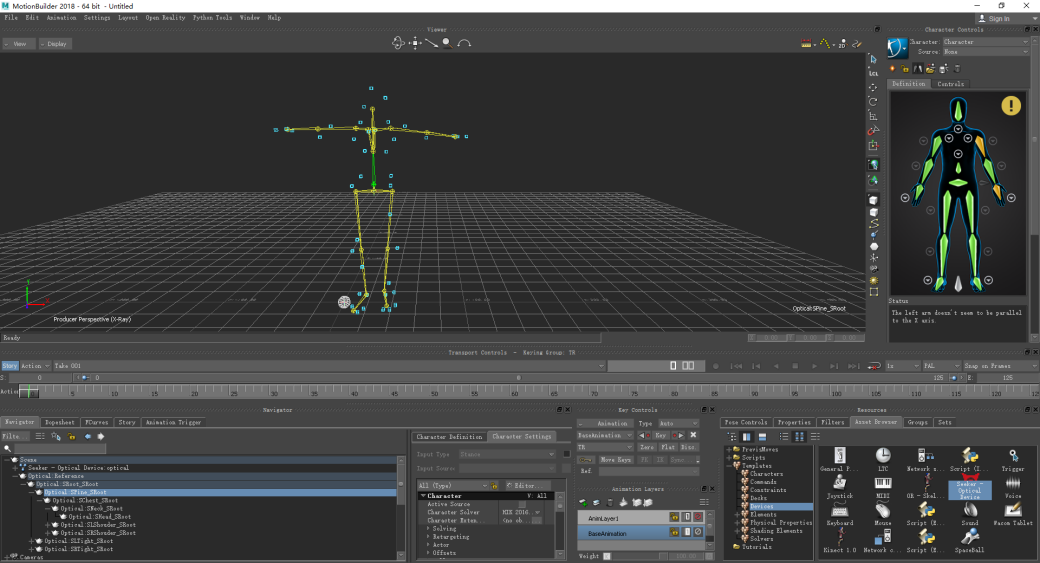
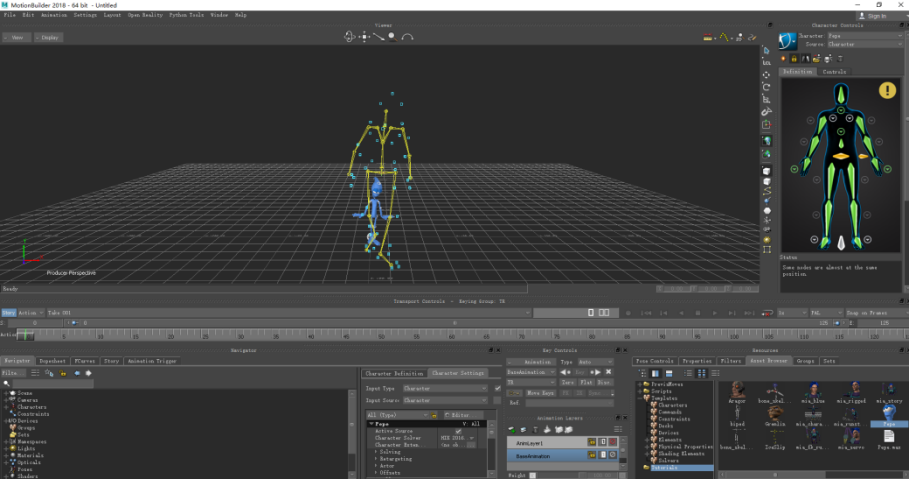
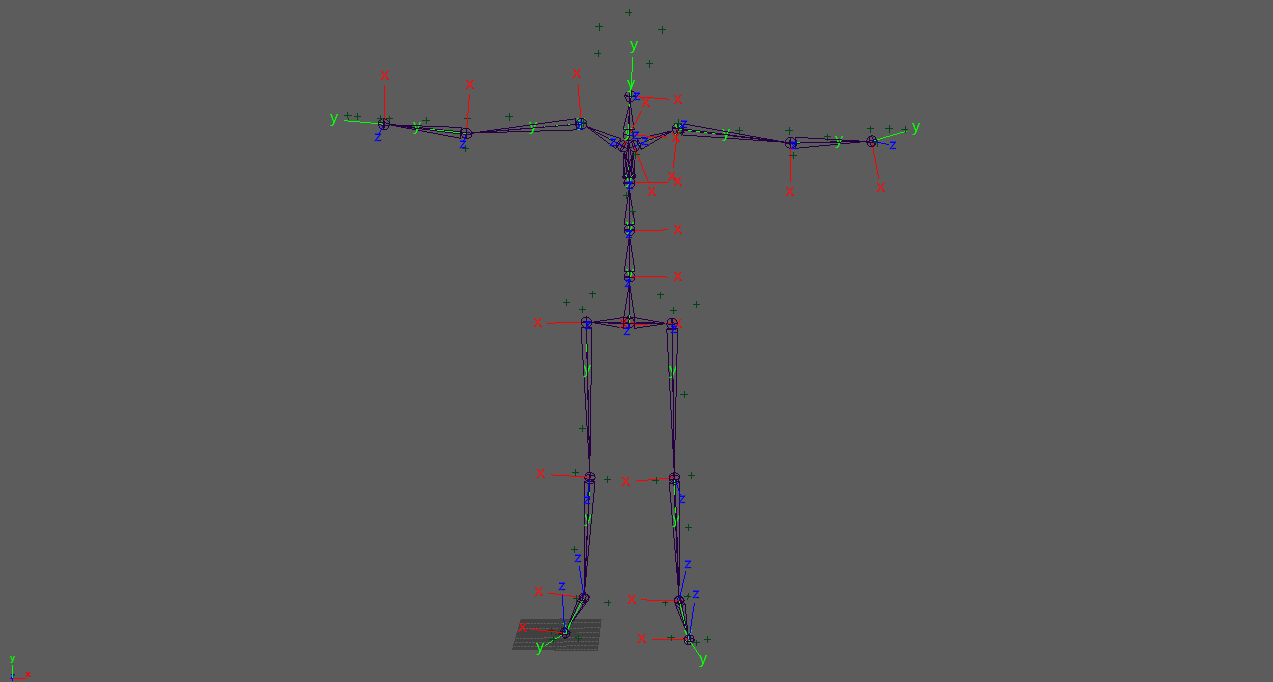
Select "Define—Skeleton" in the right window, then click "Characterize Definition" in the Navigator. In the scene,
select a joint, right-click to assign the skeleton in the definition to bind it. After all joints are bound, click
the lock icon (Lock character) and select "biped" to complete characterizing.
Import the model to be driven into MotionBuilder and perform the characterization process as described in step 4. In
the "Character Controls" window, select the imported model character in the "Character" column, and select the
XINGYING human skeleton character in the "Source" column. Allow the movement of the human body in XINGYING software
to drive the model.
When redirecting motion capture data to a skeleton, you can use MotionBuilder's auto-binding feature for one-click
binding.
First, connect the motion capture human body data. In Live mode, have the human body stand in a standard T-Pose and
pause the motion capture playback. If using Edit Mode, pause the human body data at the first frame.
Open the settings in the motion capture software, set the IP network card address to "10.1.1.198, " and select the "
SDK" option. Connect the motion capture data in MotionBuilder by referencing the specific steps from the earlier "
MotionBuilder Setup and Usage" section.
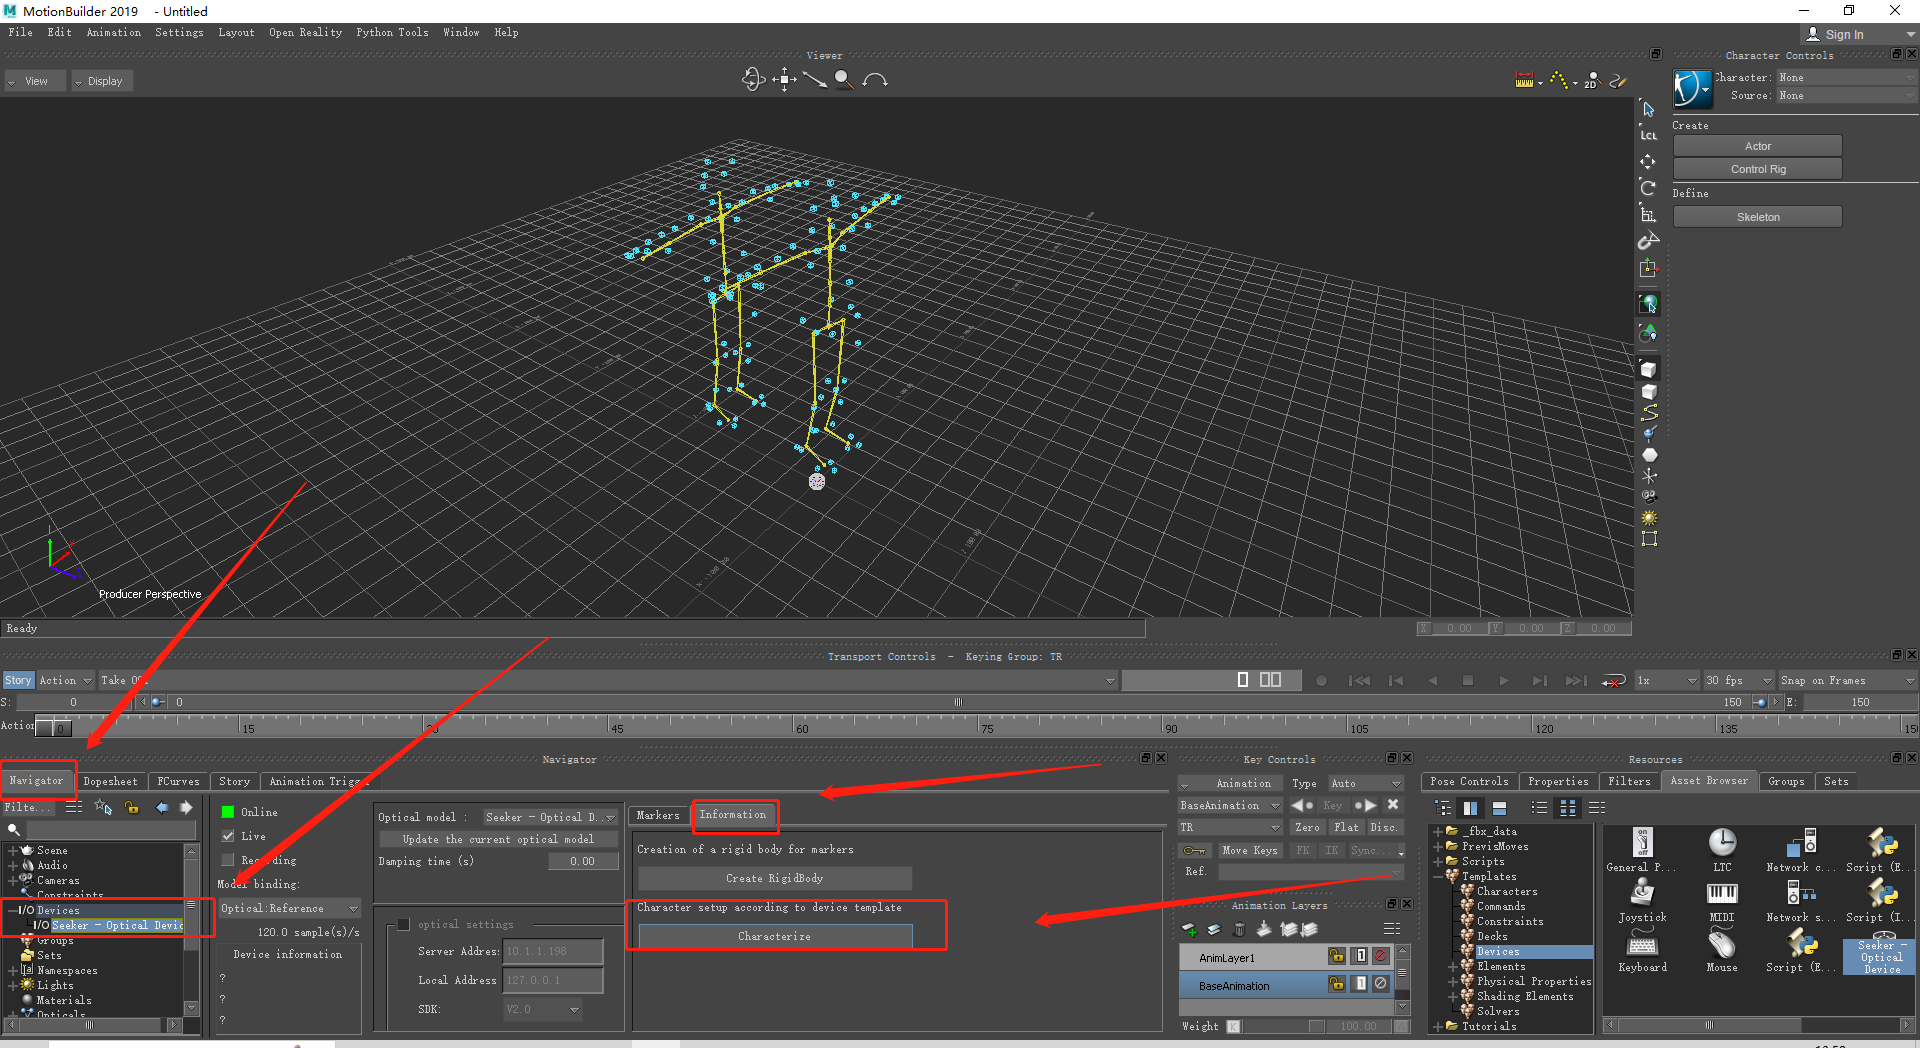
In MotionBuilder's lower left-side "Navigator" tab, expand "I/O Devices," click on "I/O Seeker-Optical Device," and
in the middle right "Information" section, click "Characterize" ;
At this point, the motion capture human skeleton will be automatically bound in MotionBuilder. Expanding "Characters"
will display the bound human body name, which will match the human body name in the motion capture data.
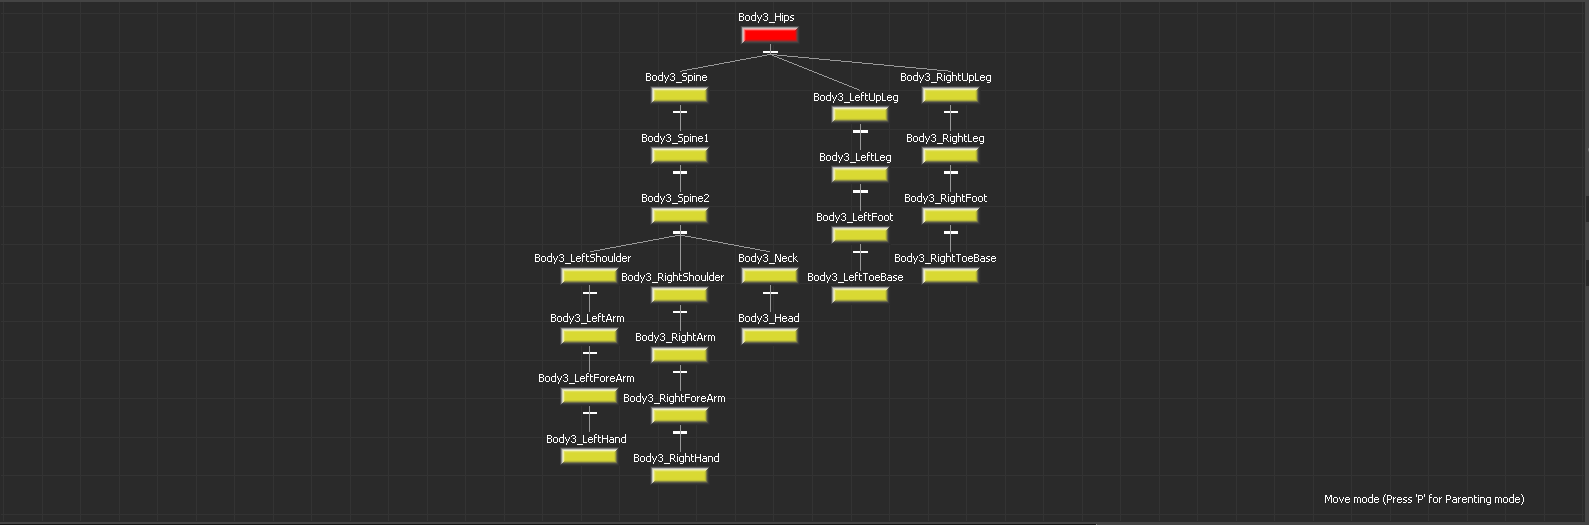
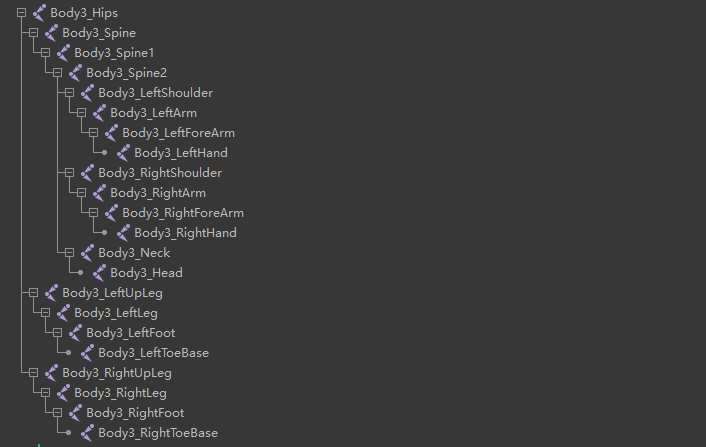
When characterizing motion capture data in MotionBuilder, the imported model's skeleton should match the XINGYING
human skeleton as closely as possible, and the hierarchy of the model's skeleton should align with the hierarchy of
the XINGYING human skeleton. The hierarchy of the XINGYING human skeleton, skeleton names, and the skeleton prefix "
Body3" refer to the XINGYING human body name.
After importing the model into MotionBuilder, please adjust the model's pose to a T-Pose and ensure it matches the
T-Pose of the XINGYING human body before driving the motion. The skeleton axes of the model must be consistent with
the axes of the XINGYING human skeleton.
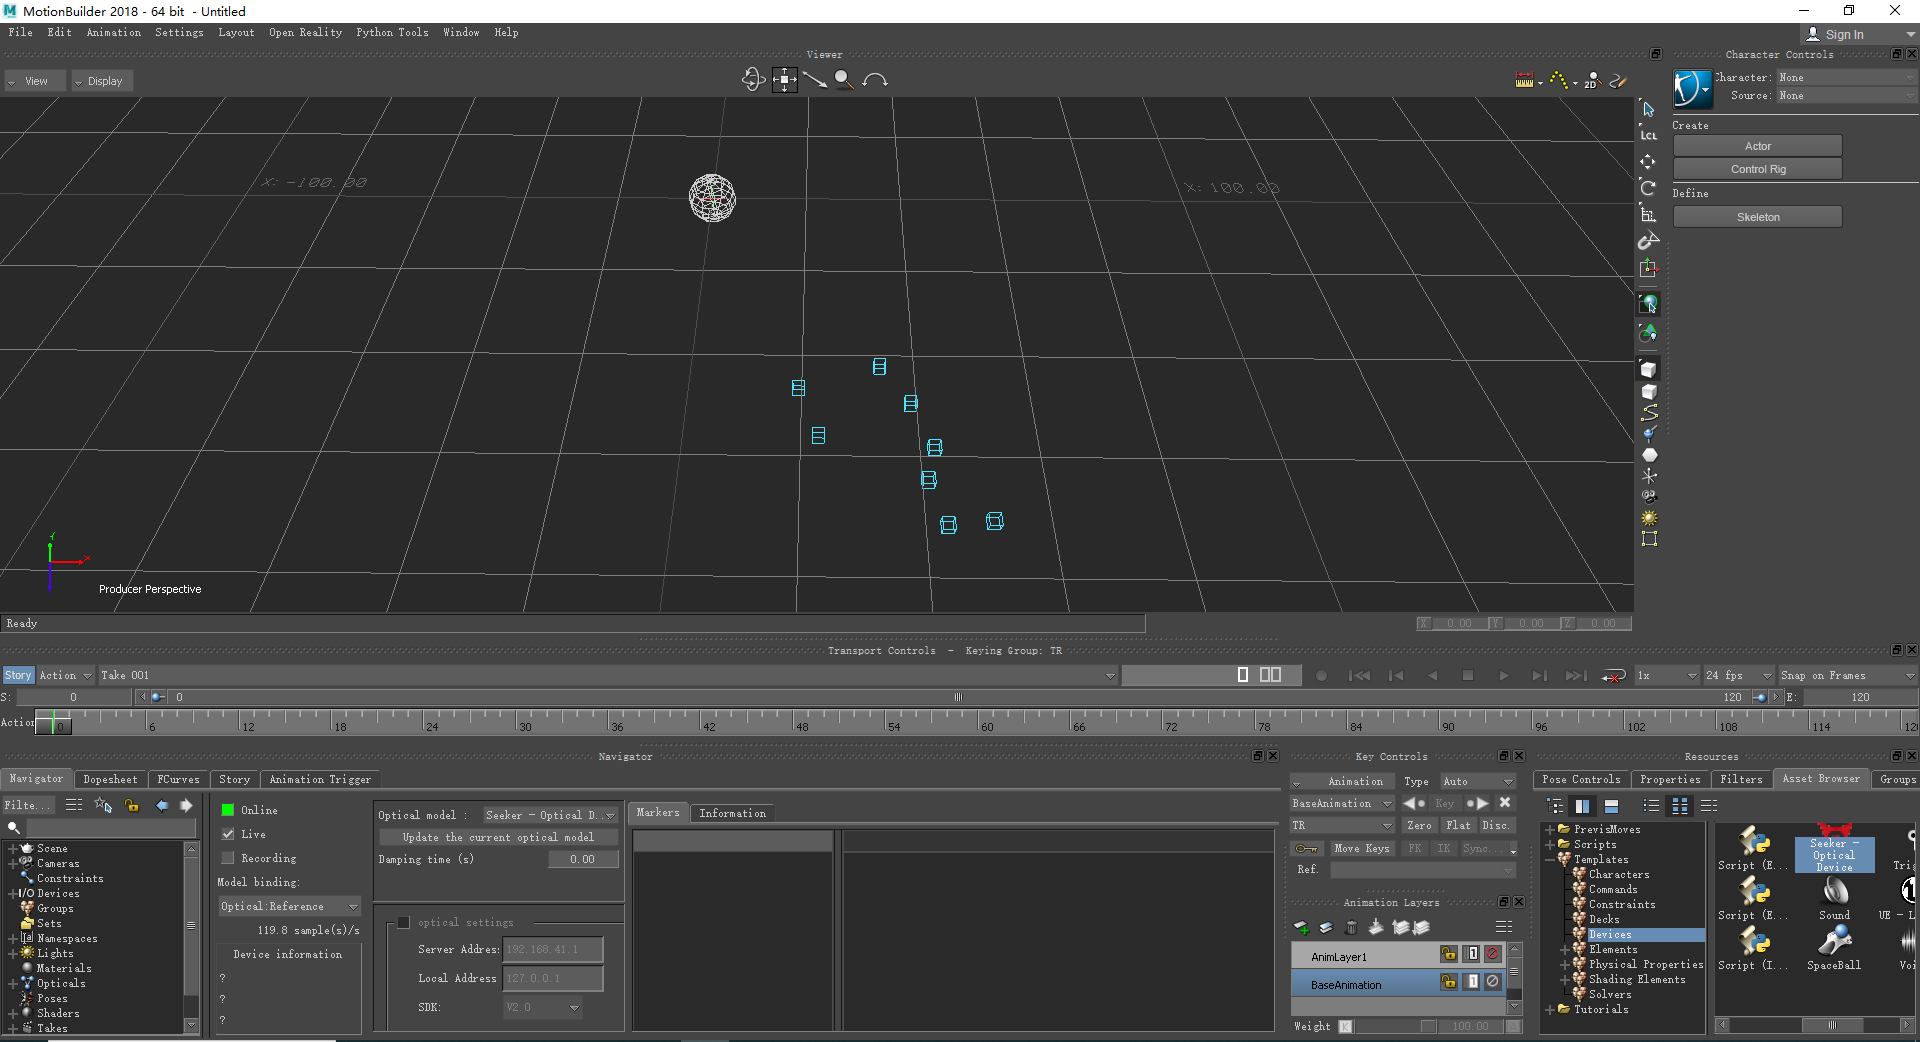
Create a rigid body in XINGYING Live mode or load rigid body data in Edit Mode. Open MotionBuilder software, drag the
XINGYING plugin into the scene, and click the Online button in the lower interface "Navigator—I/O devices—I/O
Seeker - Optical Device" to enter Live status. Click "Model binding, " choose the Create button, and under "Optical
model, " click "Generate a new optical model." Play XINGYING software, and marker points will be displayed in the
MotionBuilder scene.
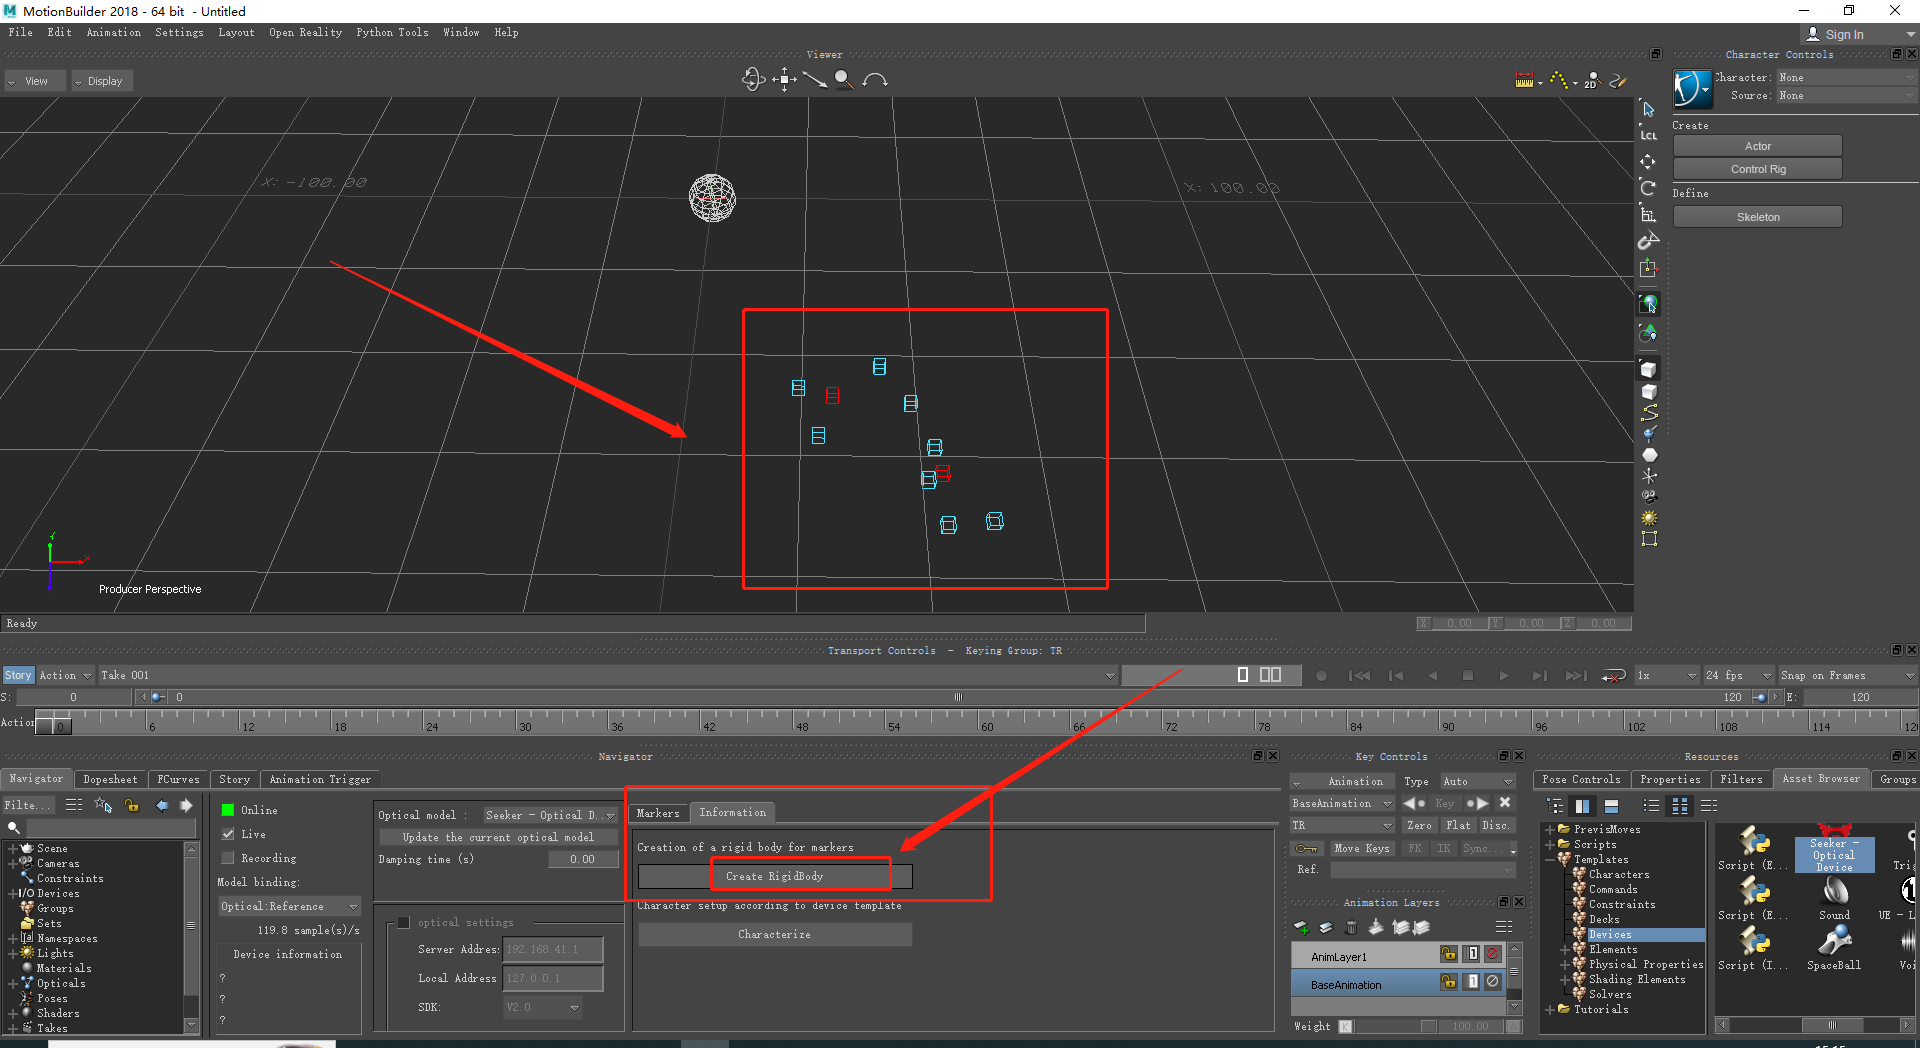
In the lower-left "Navigator" tab of MotionBuilder, expand "I/O Devices, " click "I/O Seeker-Optical Device, " and in
the middle-right "Information" section, click "Create RigidBody." The rigid body will then be successfully created.
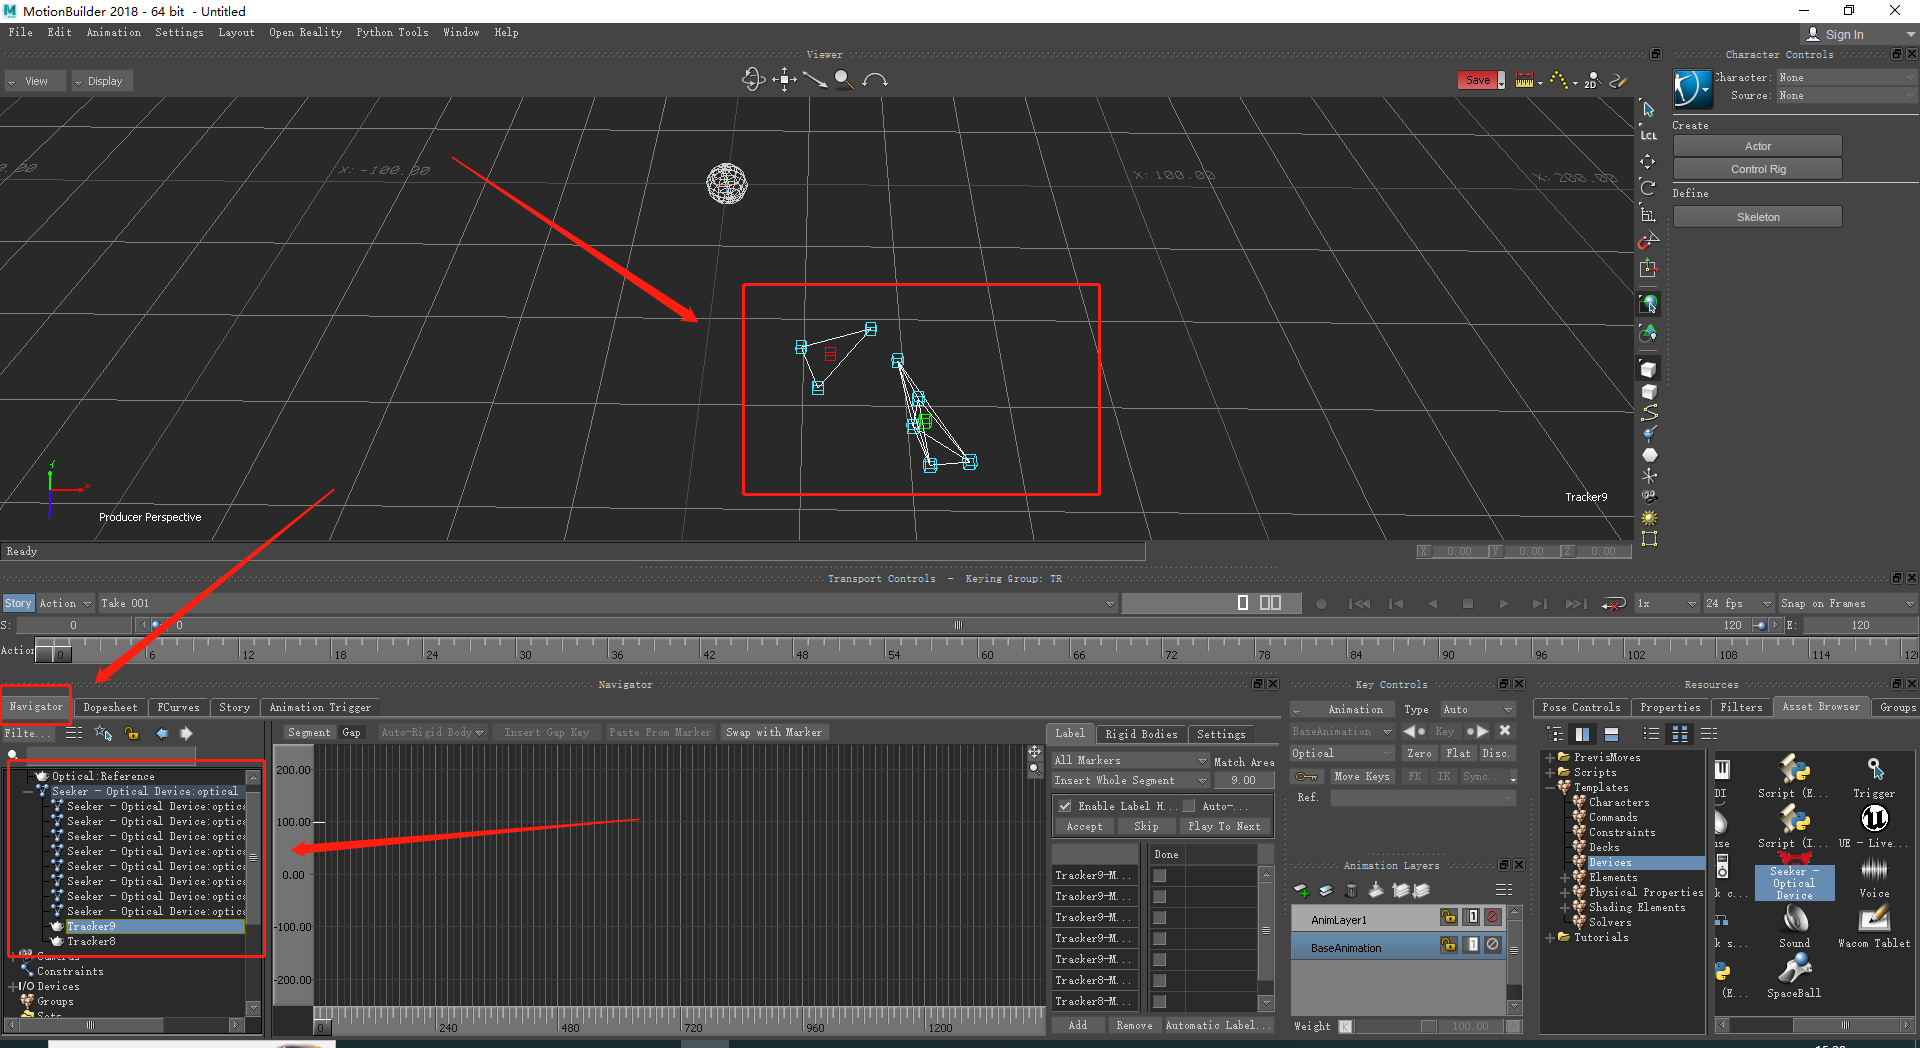
In the "Navigator" tab, expand "Scene, " and within "Scene" expand Seeker-Optical Device: Optical. Scroll to the
bottom to see the created rigid body's name, which matches the rigid body name in XINGYING. Double-click the rigid
body's name, and the rigid body in the scene will display connections. The selected rigid body will be highlighted,
changing from red to green.
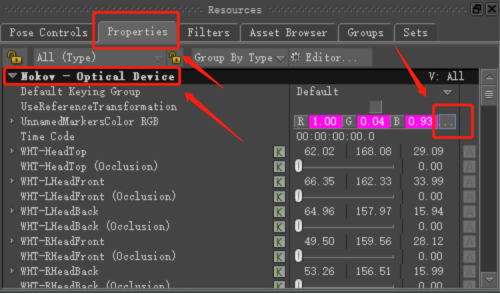
After obtaining motion capture data using the Motionbuilder plugin, if there are unnamed points in the motion capture
data, these will also be displayed in the Motionbuilder scene. The default color for unnamed points is purple, while
named points are colored blue.
Adjusting the Color of Unnamed Points: In Motionbuilder, you can modify the color of unnamed points from the motion
capture data in the scene. The steps are as follows: First, in the "Navigator" tab, expand "I/O Devices" and select "
I/O NOKOV-Optical Device."
Next, in the lower right corner of the Motionbuilder interface, select Properties. Below Default, click the "..."
button, and in the popup Color window, you can modify the color of the unnamed points.
After receiving the human body data from XINGYING, if there is a change in the XINGYING template, you can select the "
Information" tab at the bottom middle of Motionbuilder, and click the "Refresh" button to refresh the Motionbuilder
scene. This prevents the human skeleton from becoming stuck in the scene when the XINGYING human body template
changes.
After characterizing the XINGYING human body data and the model that needs to be driven, it is necessary to select the
created character and the source. Before doing so, we need to check the "Use Tpose" checkbox to force the XINGYING
human body skeleton in the scene to display the standard T-pose posture. Since models imported into Motionbuilder are
usually in a standard T-pose, we want our human skeleton to match the posture of the model. After ensuring consistency
in the posture, then select the character and source. This way, when the XINGYING human body data drives the model in
real-time, the model's actions will stay consistent with the XINGYING human body model's movements.

.png)